Adding Fractions with different denominators: promoting the massive skill
Based on students’ knowledge of fractions and their ability to add fractions with common denominators, we suggest moving to the next step – learning how to add fractions with unlike denominators.
At this point, students rely on their expertise in fraction equivalence, working through all aspects of adding fractions, and gradually shifting from pictorial to abstract references. Finally, they get to the stage where they can solve word problems on fraction addition with no visual support.
Equivalent fractions
Adding fractions with unlike denominators is based on finding a common denominator of the given fractions. That’s why we recommend starting by introducing students to the basics of fraction equivalency as it’s one of the many important steps toward mastering the skill.
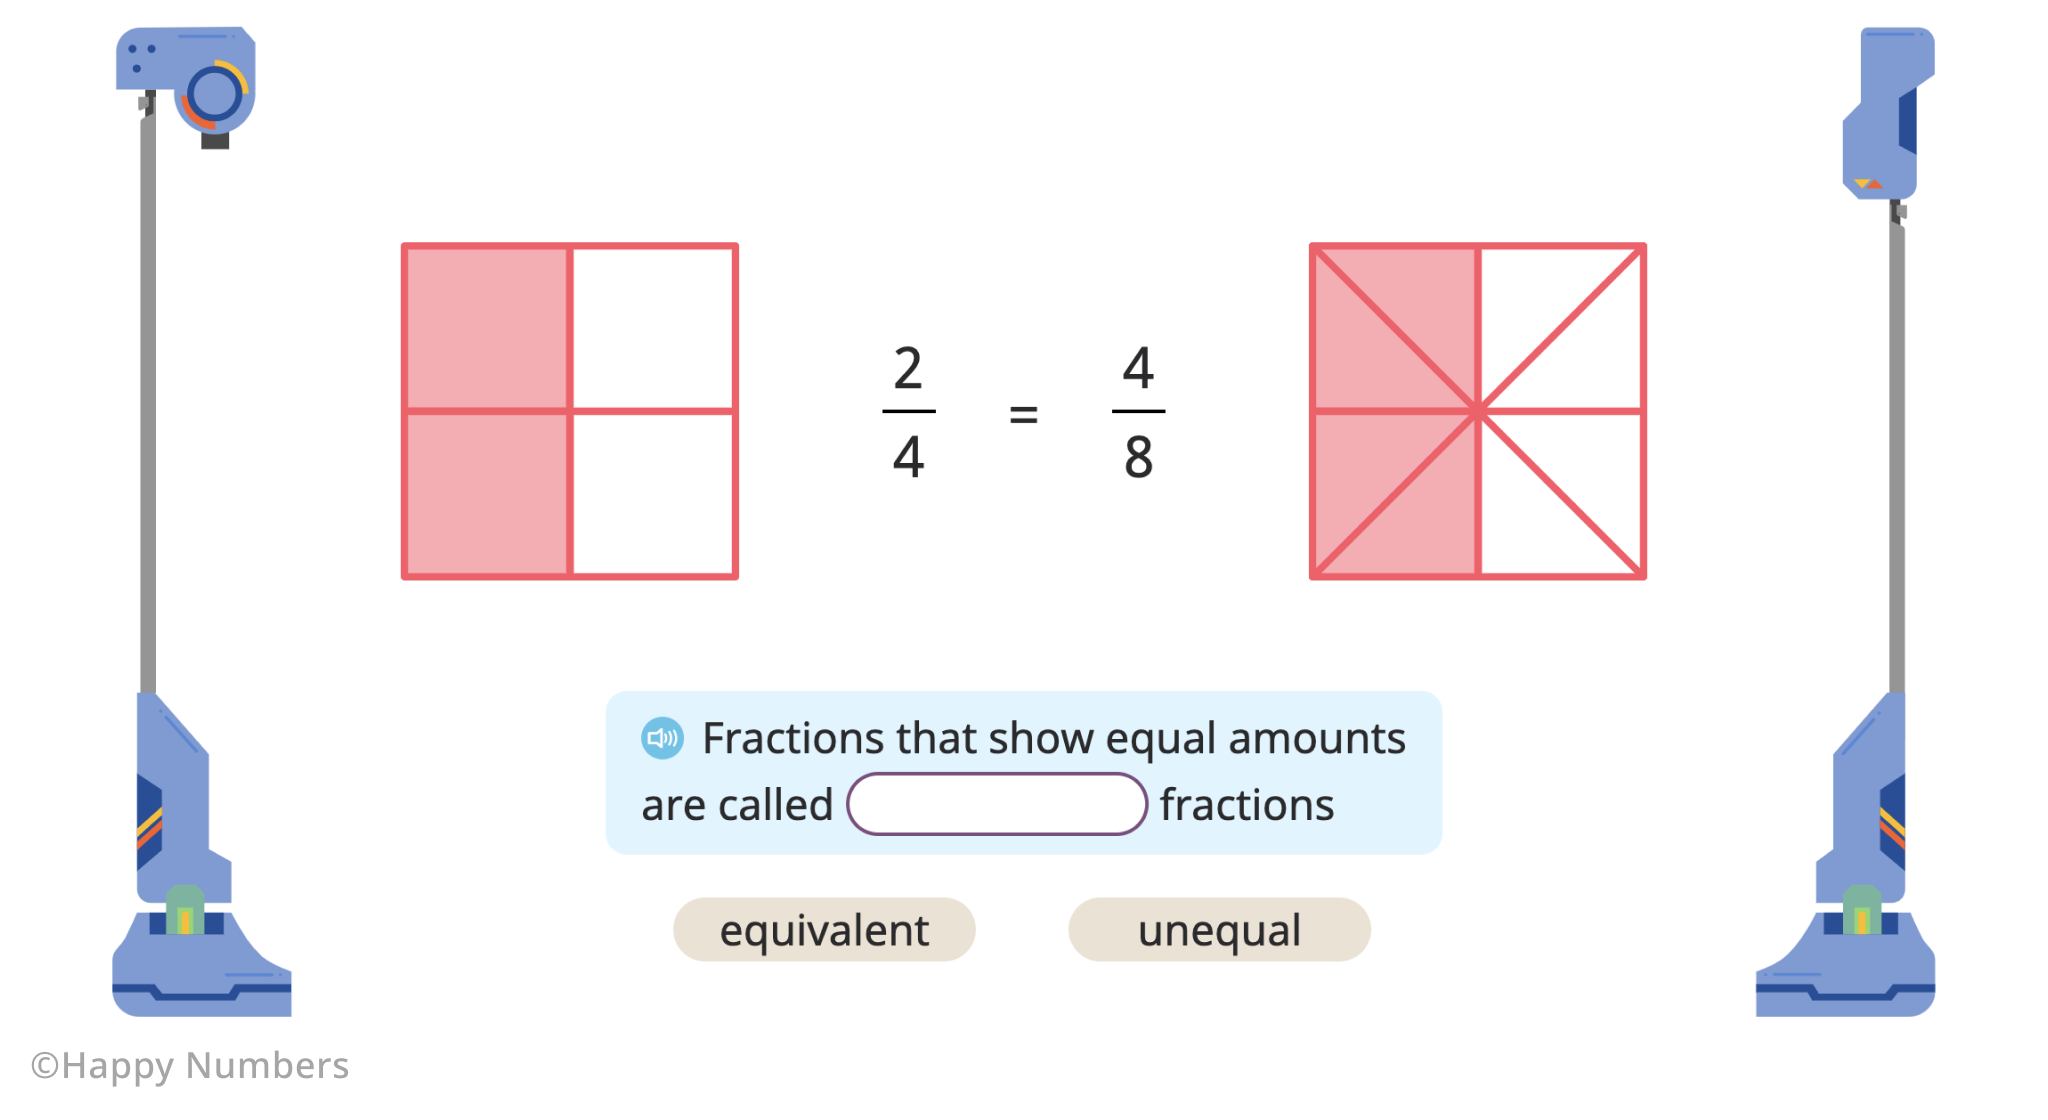
It’s always a good idea to include models as visual references from the start to explain the concept behind fraction equivalency: the same part of the shape, or the same amount of the whole, can be represented in two different ways, depending on the total number of parts into which the shape has been divided.
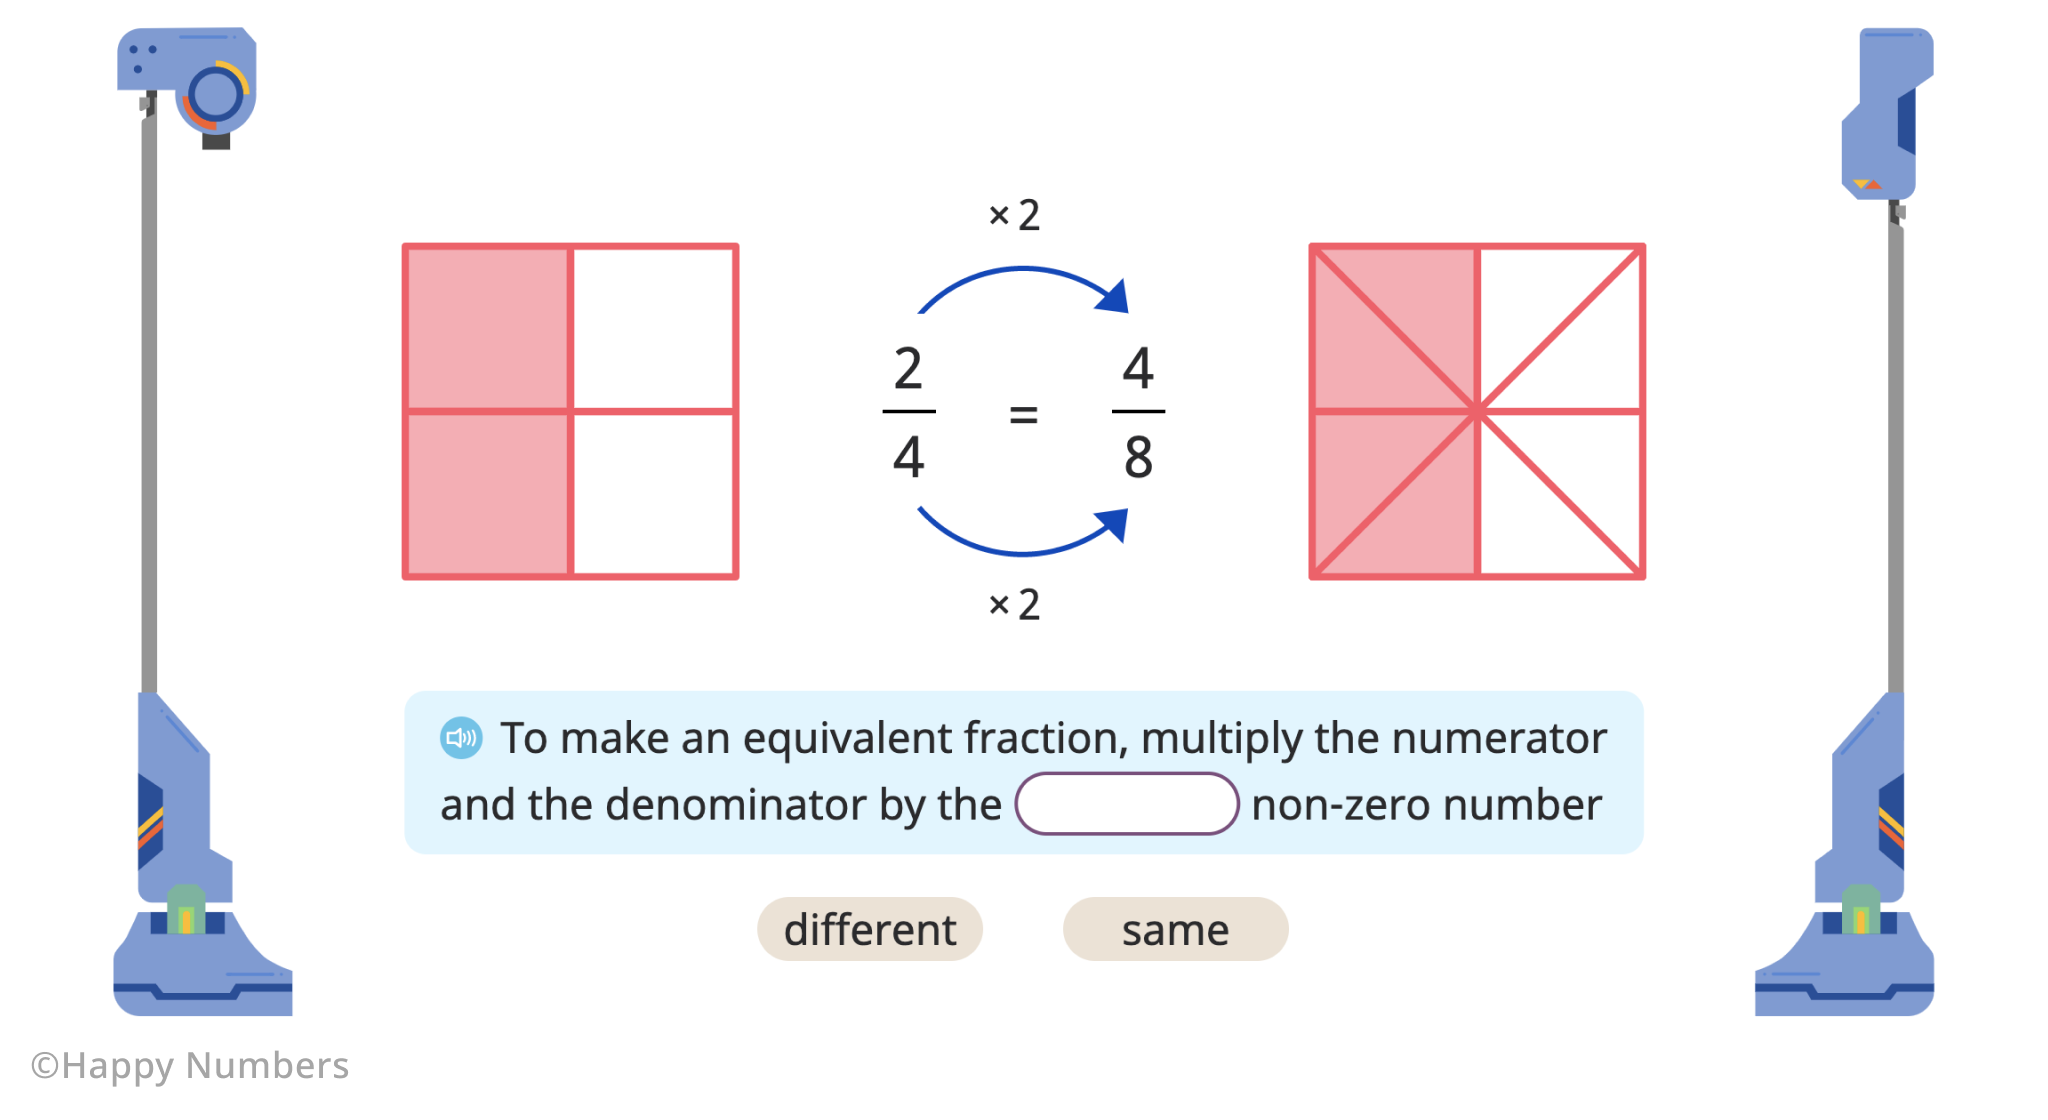
Taking a step further, teachers can explain how exactly these two fractional representations are related to each other: one is the equivalent of another. Help students see that when the numerator and the denominator of the fraction are multiplied by the same number the result will be an equivalent fraction, in which, the numerator and the denominator are greater than the initial one.
In order to make it more obvious, try using fraction bars - these are familiar tools that help students visually represent the fraction equivalency. Students need to engage with the problems so that it’s easier to solve them, and manipulatives are true lifesavers!
It can be even more fun to go further and let them fold and color different parts of bars of the same size. To do so, take one whole bar and fold it in half, then take another whole bar of the same size and fold it in quarters, then fold another one in eighths, etc. Ask students to color one part out of two, then two parts out of four, four parts out of eight, etc. This way they’ll notice the pattern more easily.
This is how students learn to find larger equivalents of fractions by multiplication. Once they’ve mastered that, they can move forward and find out how to calculate smaller equivalents of fractions. In other words, students keep practicing the skill by learning how to make reverse operations.
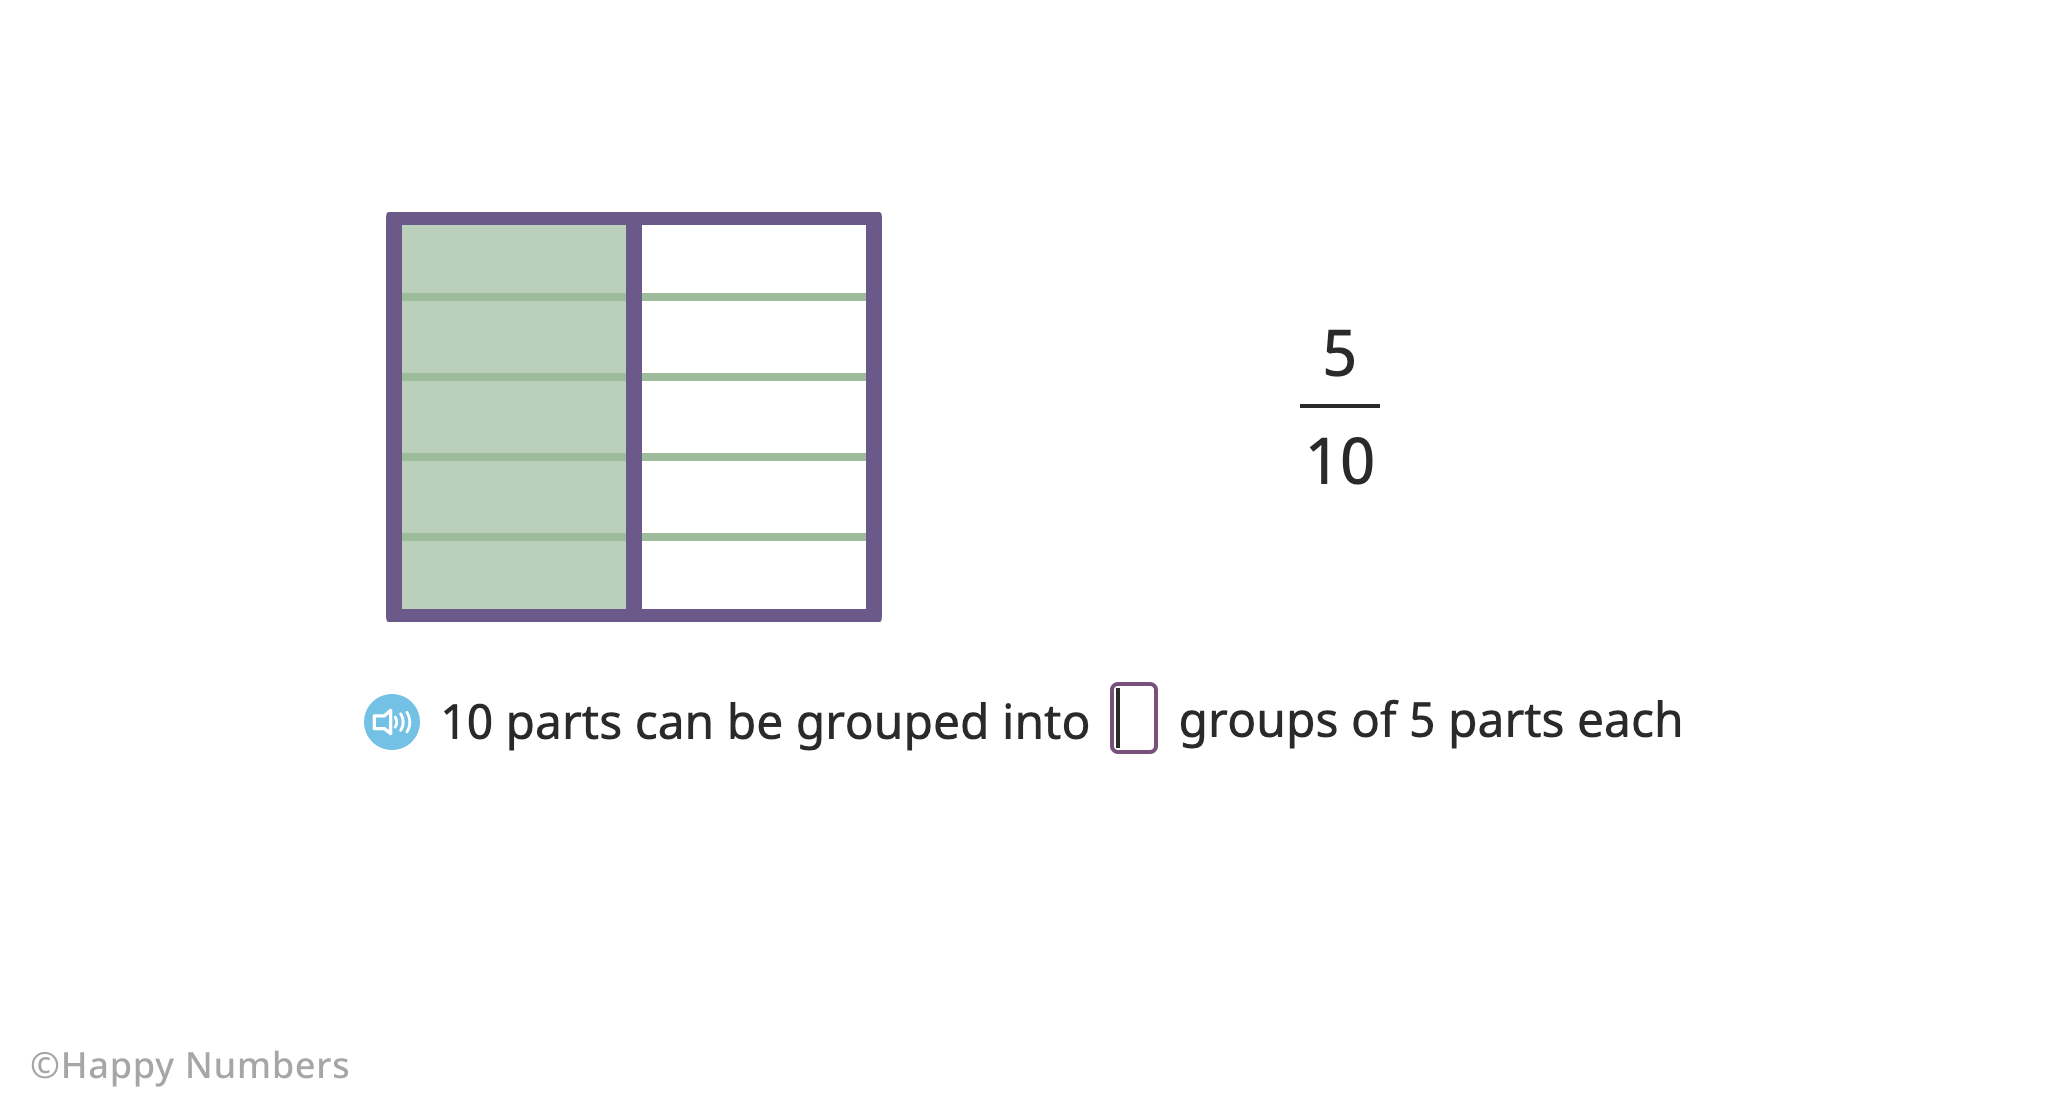
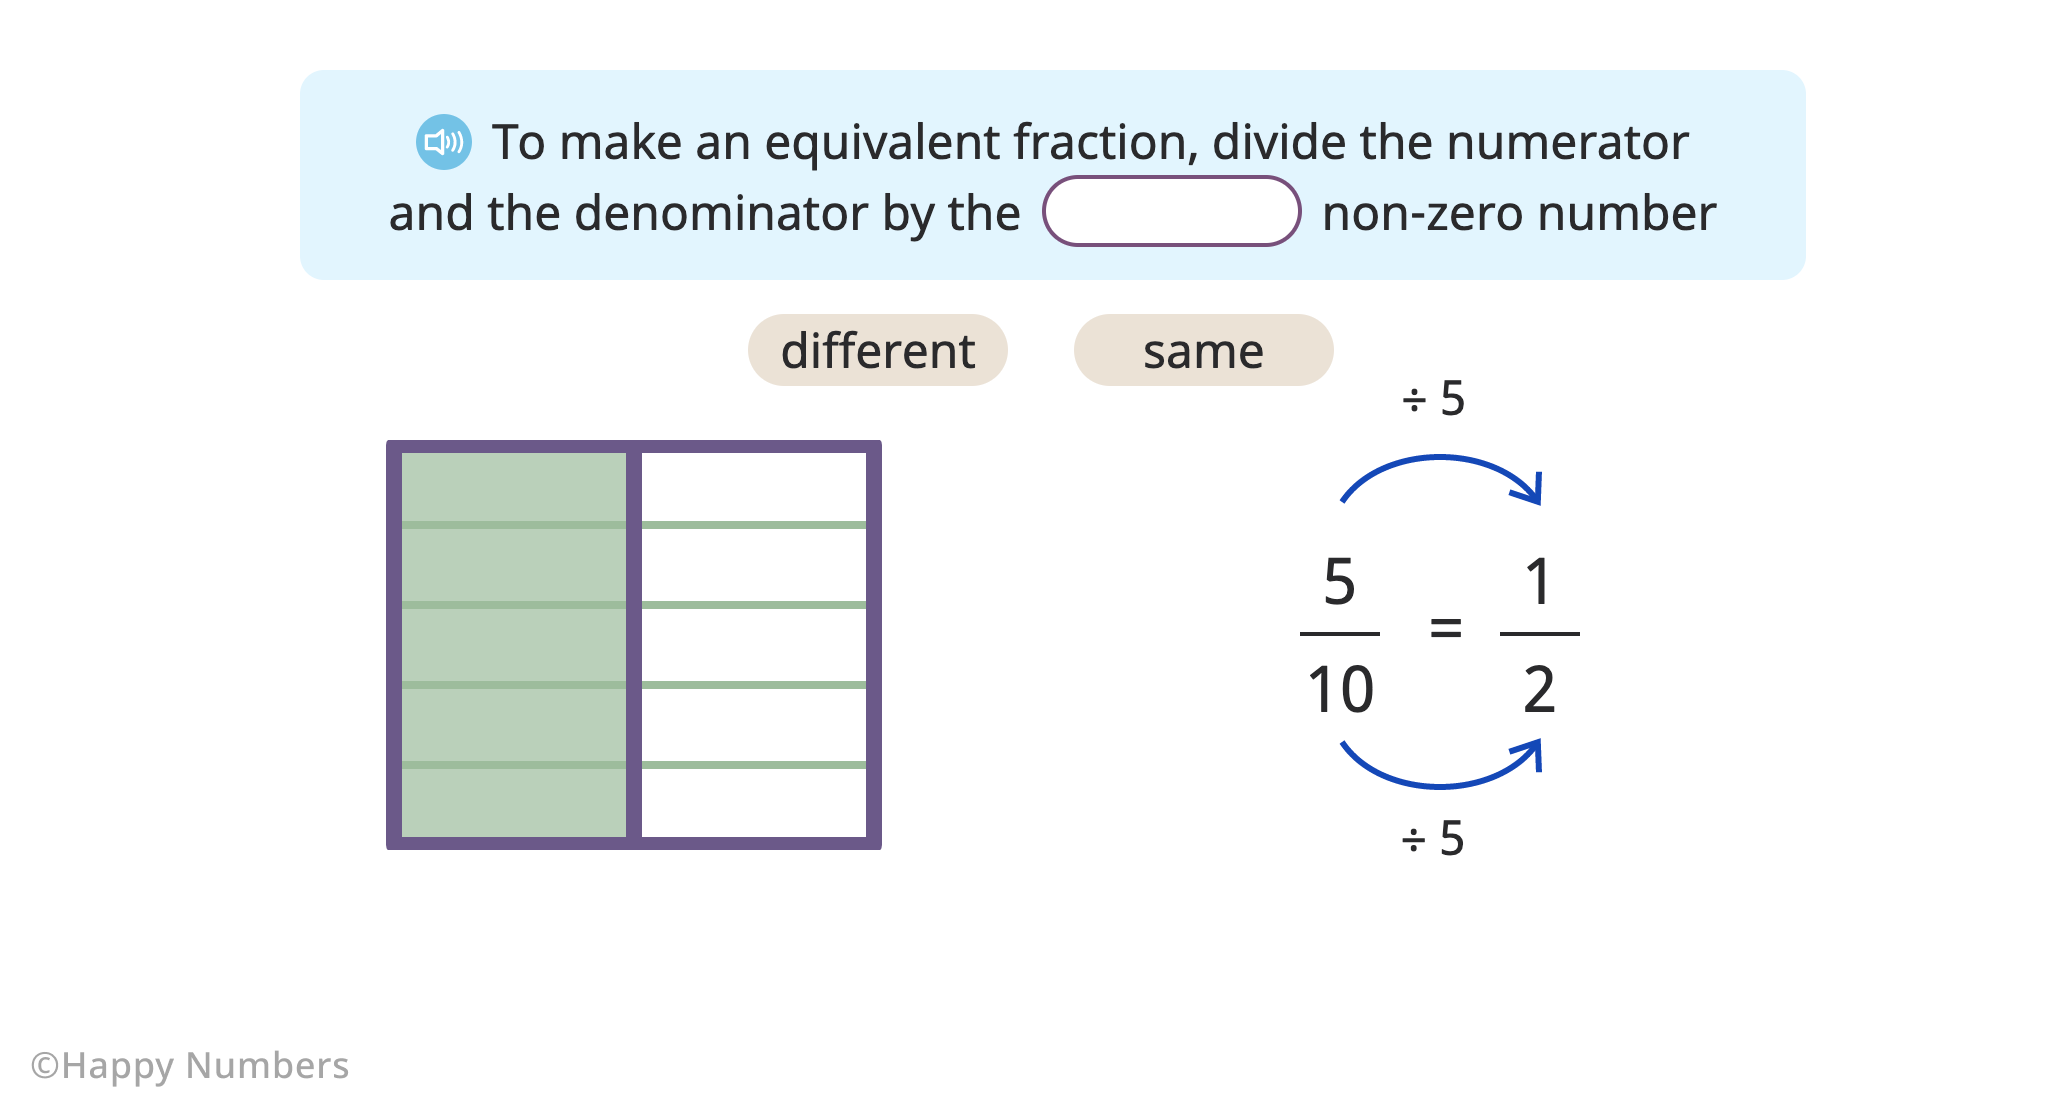
Continue referring to models as it’s still crucial for students to establish a firm understanding of fraction equivalency. Happy Numbers also continues with shapes while introducing the idea of smaller equivalents of fractions.
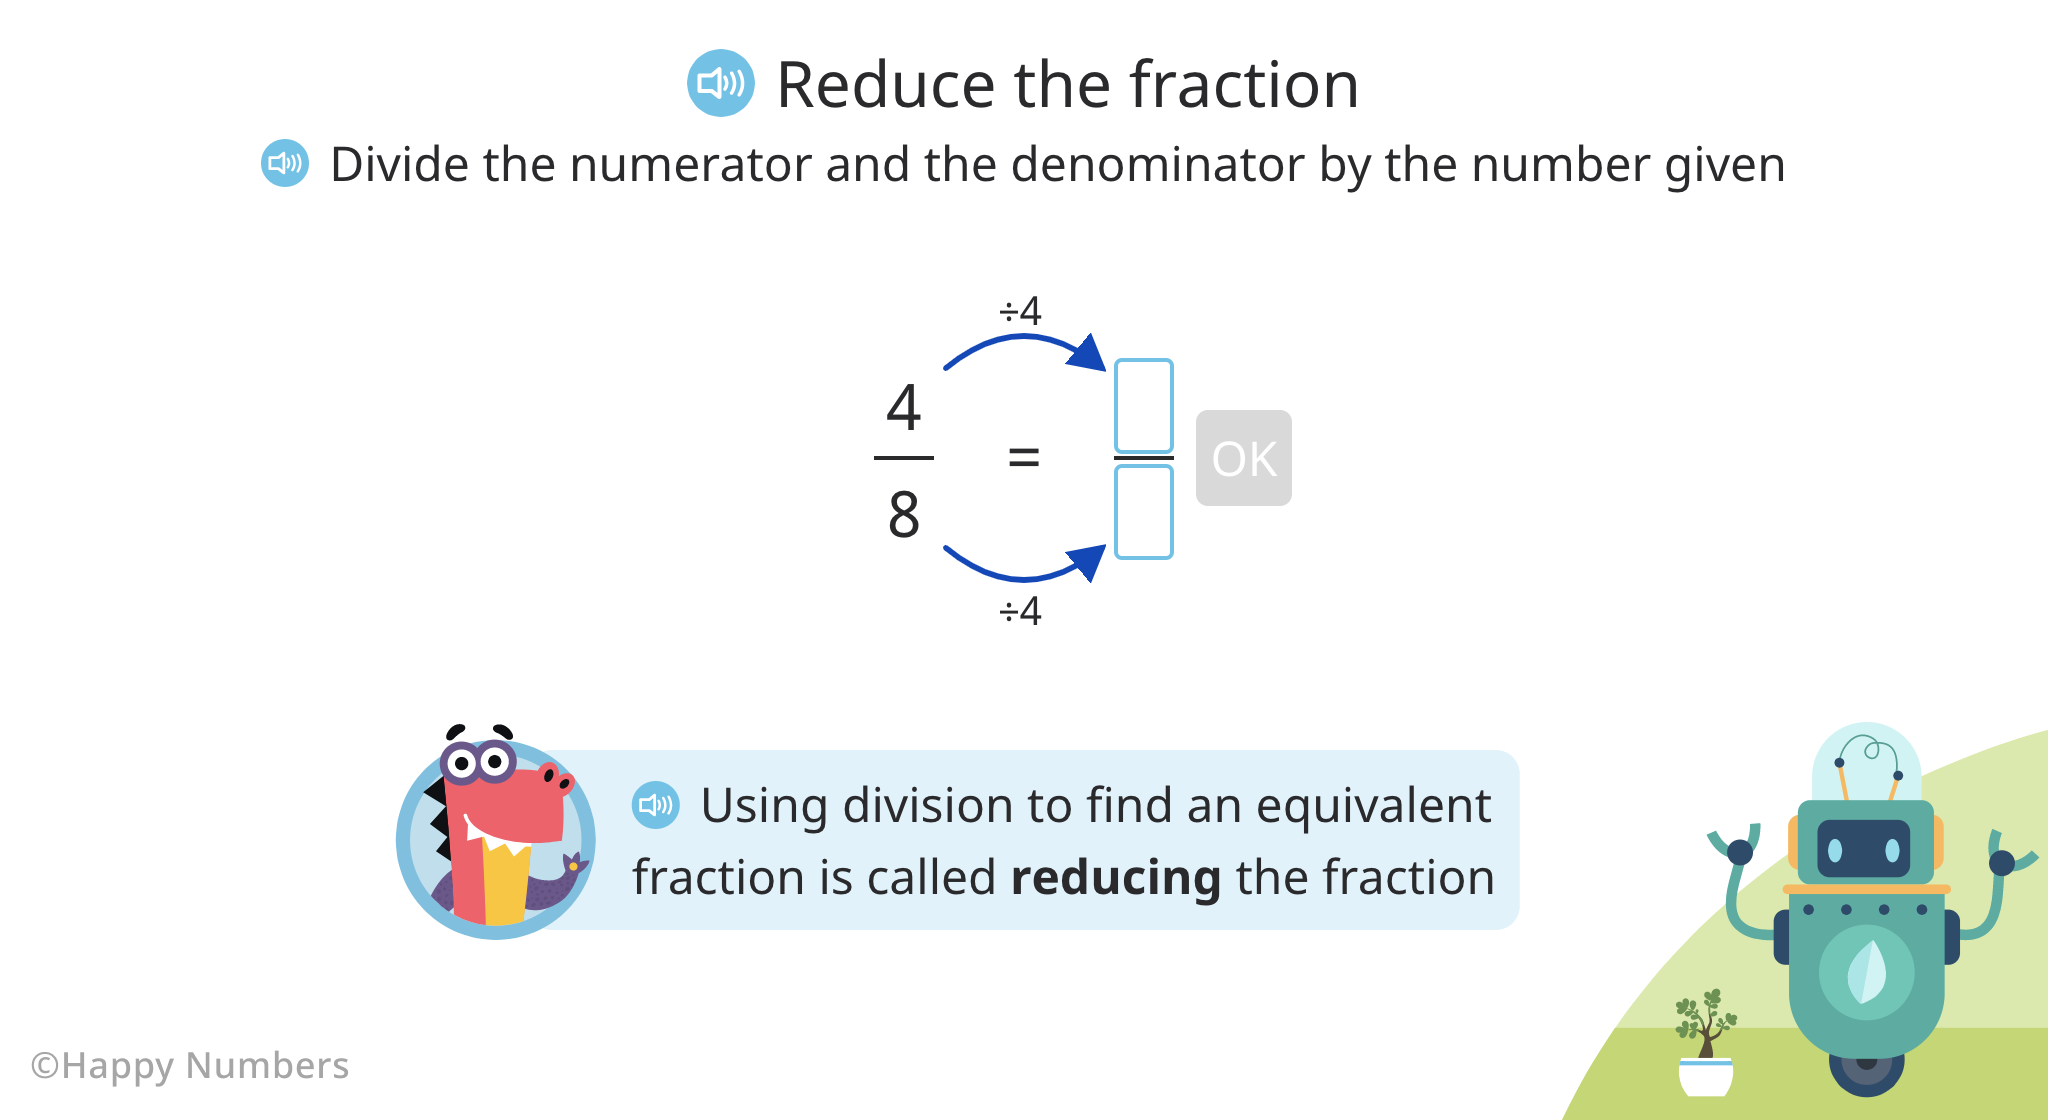
Teachers can help students see that a given shape can be divided equally in two different ways, and the same part of the shape can relate to the whole in two equivalent ways. Only this time it works the other way around: We divide the numerator and the denominator of 5/10 by 5 and have 1/2 as the result.
Once the concept is clear, it would be good to take a moment and show students that this is what actually reducing a fraction looks like. This is the perfect opportunity to highlight the importance of knowing how to find the smaller equivalent of the fraction. Being able to reduce fractions is also a very useful skill that will make future calculations with fractions easier for students.
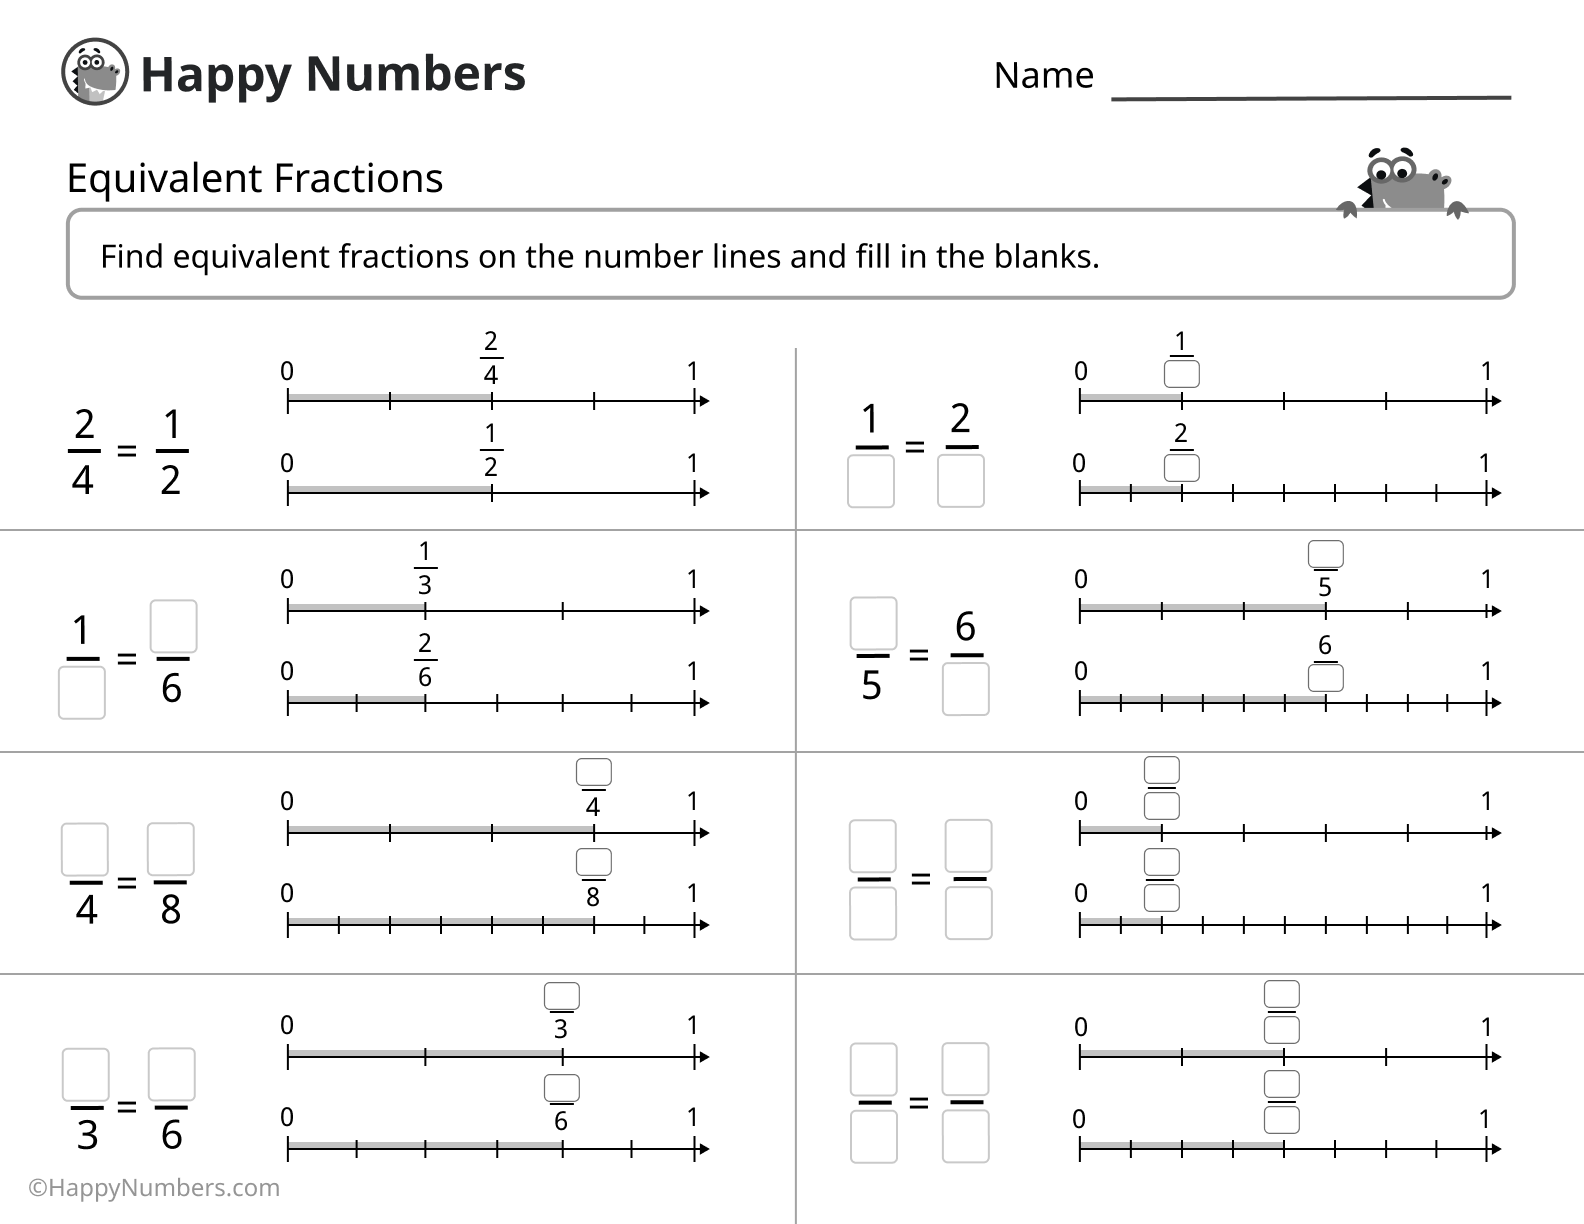
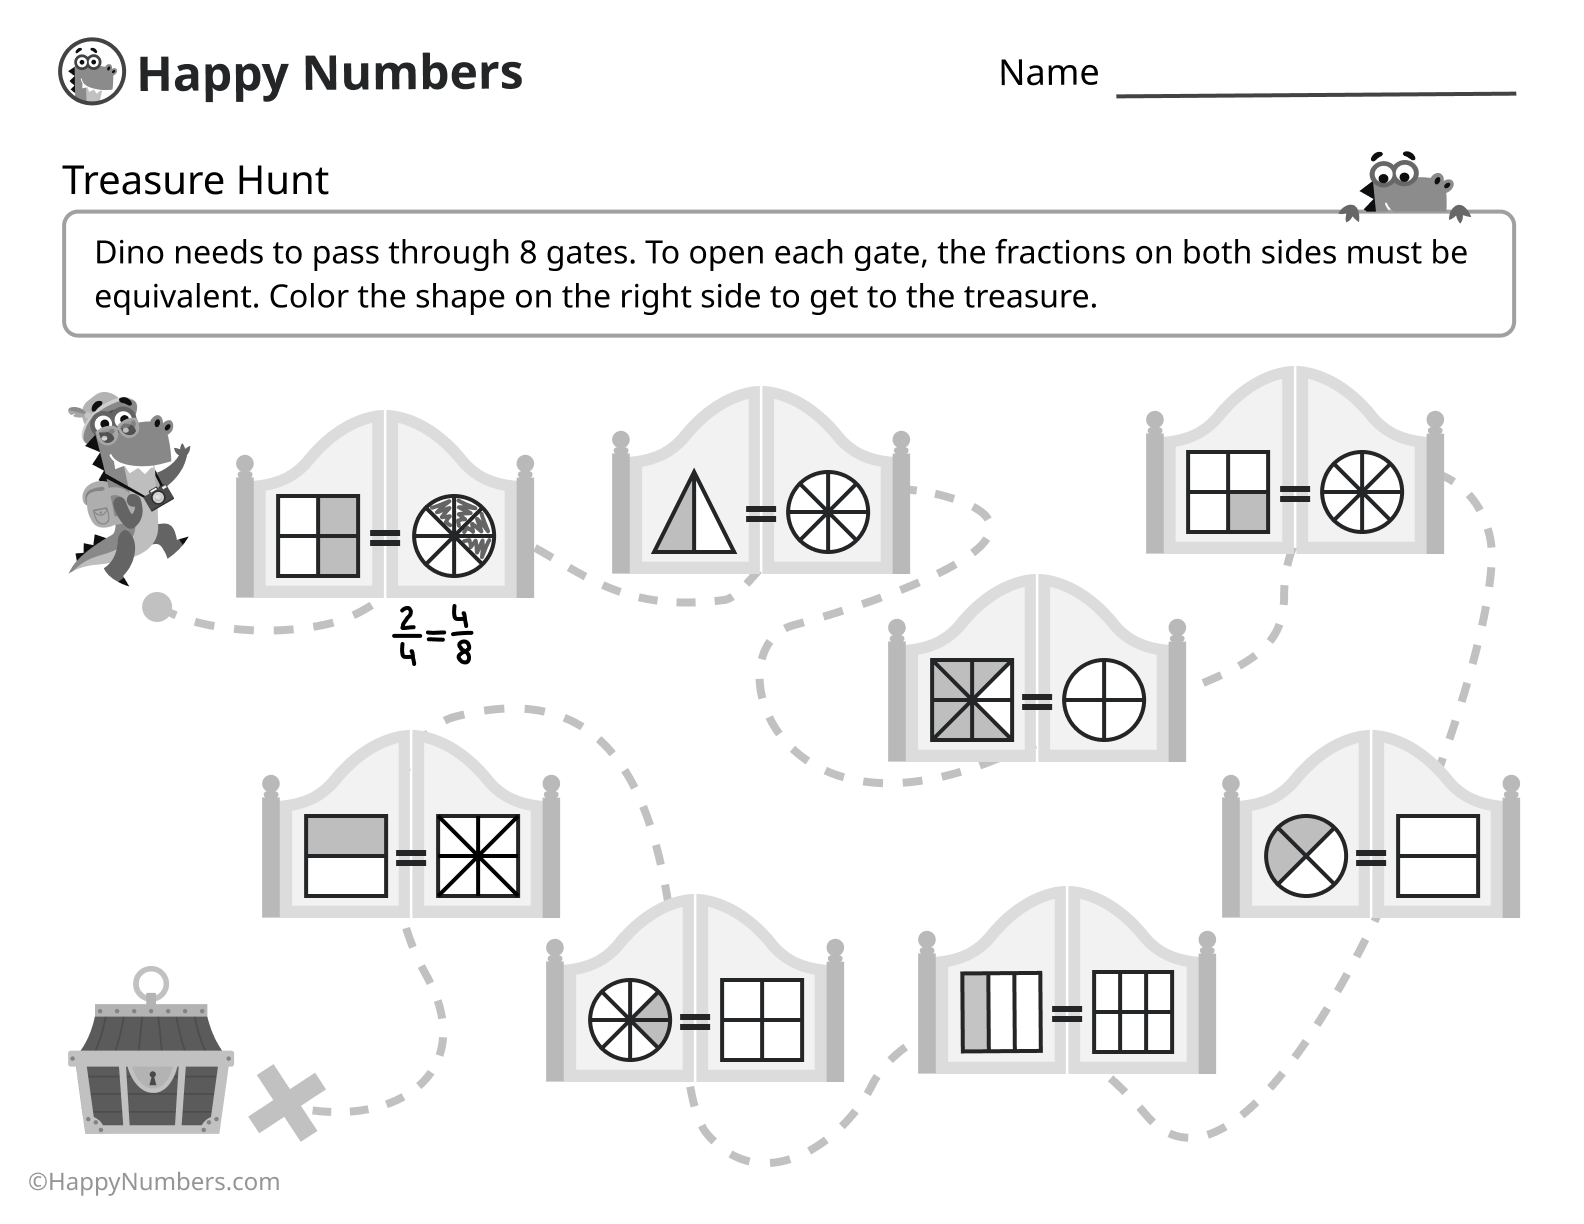
Now it’s time to make sure students have a solid understanding of fraction equivalency and are ready to work this step out on an abstract level. The best way to do this is to introduce various practice tasks: from completing the equivalent fractions, just like Happy Numbers suggests, to matching two equivalent fractions, to choosing the correct equivalent fraction from multiple given, etc.
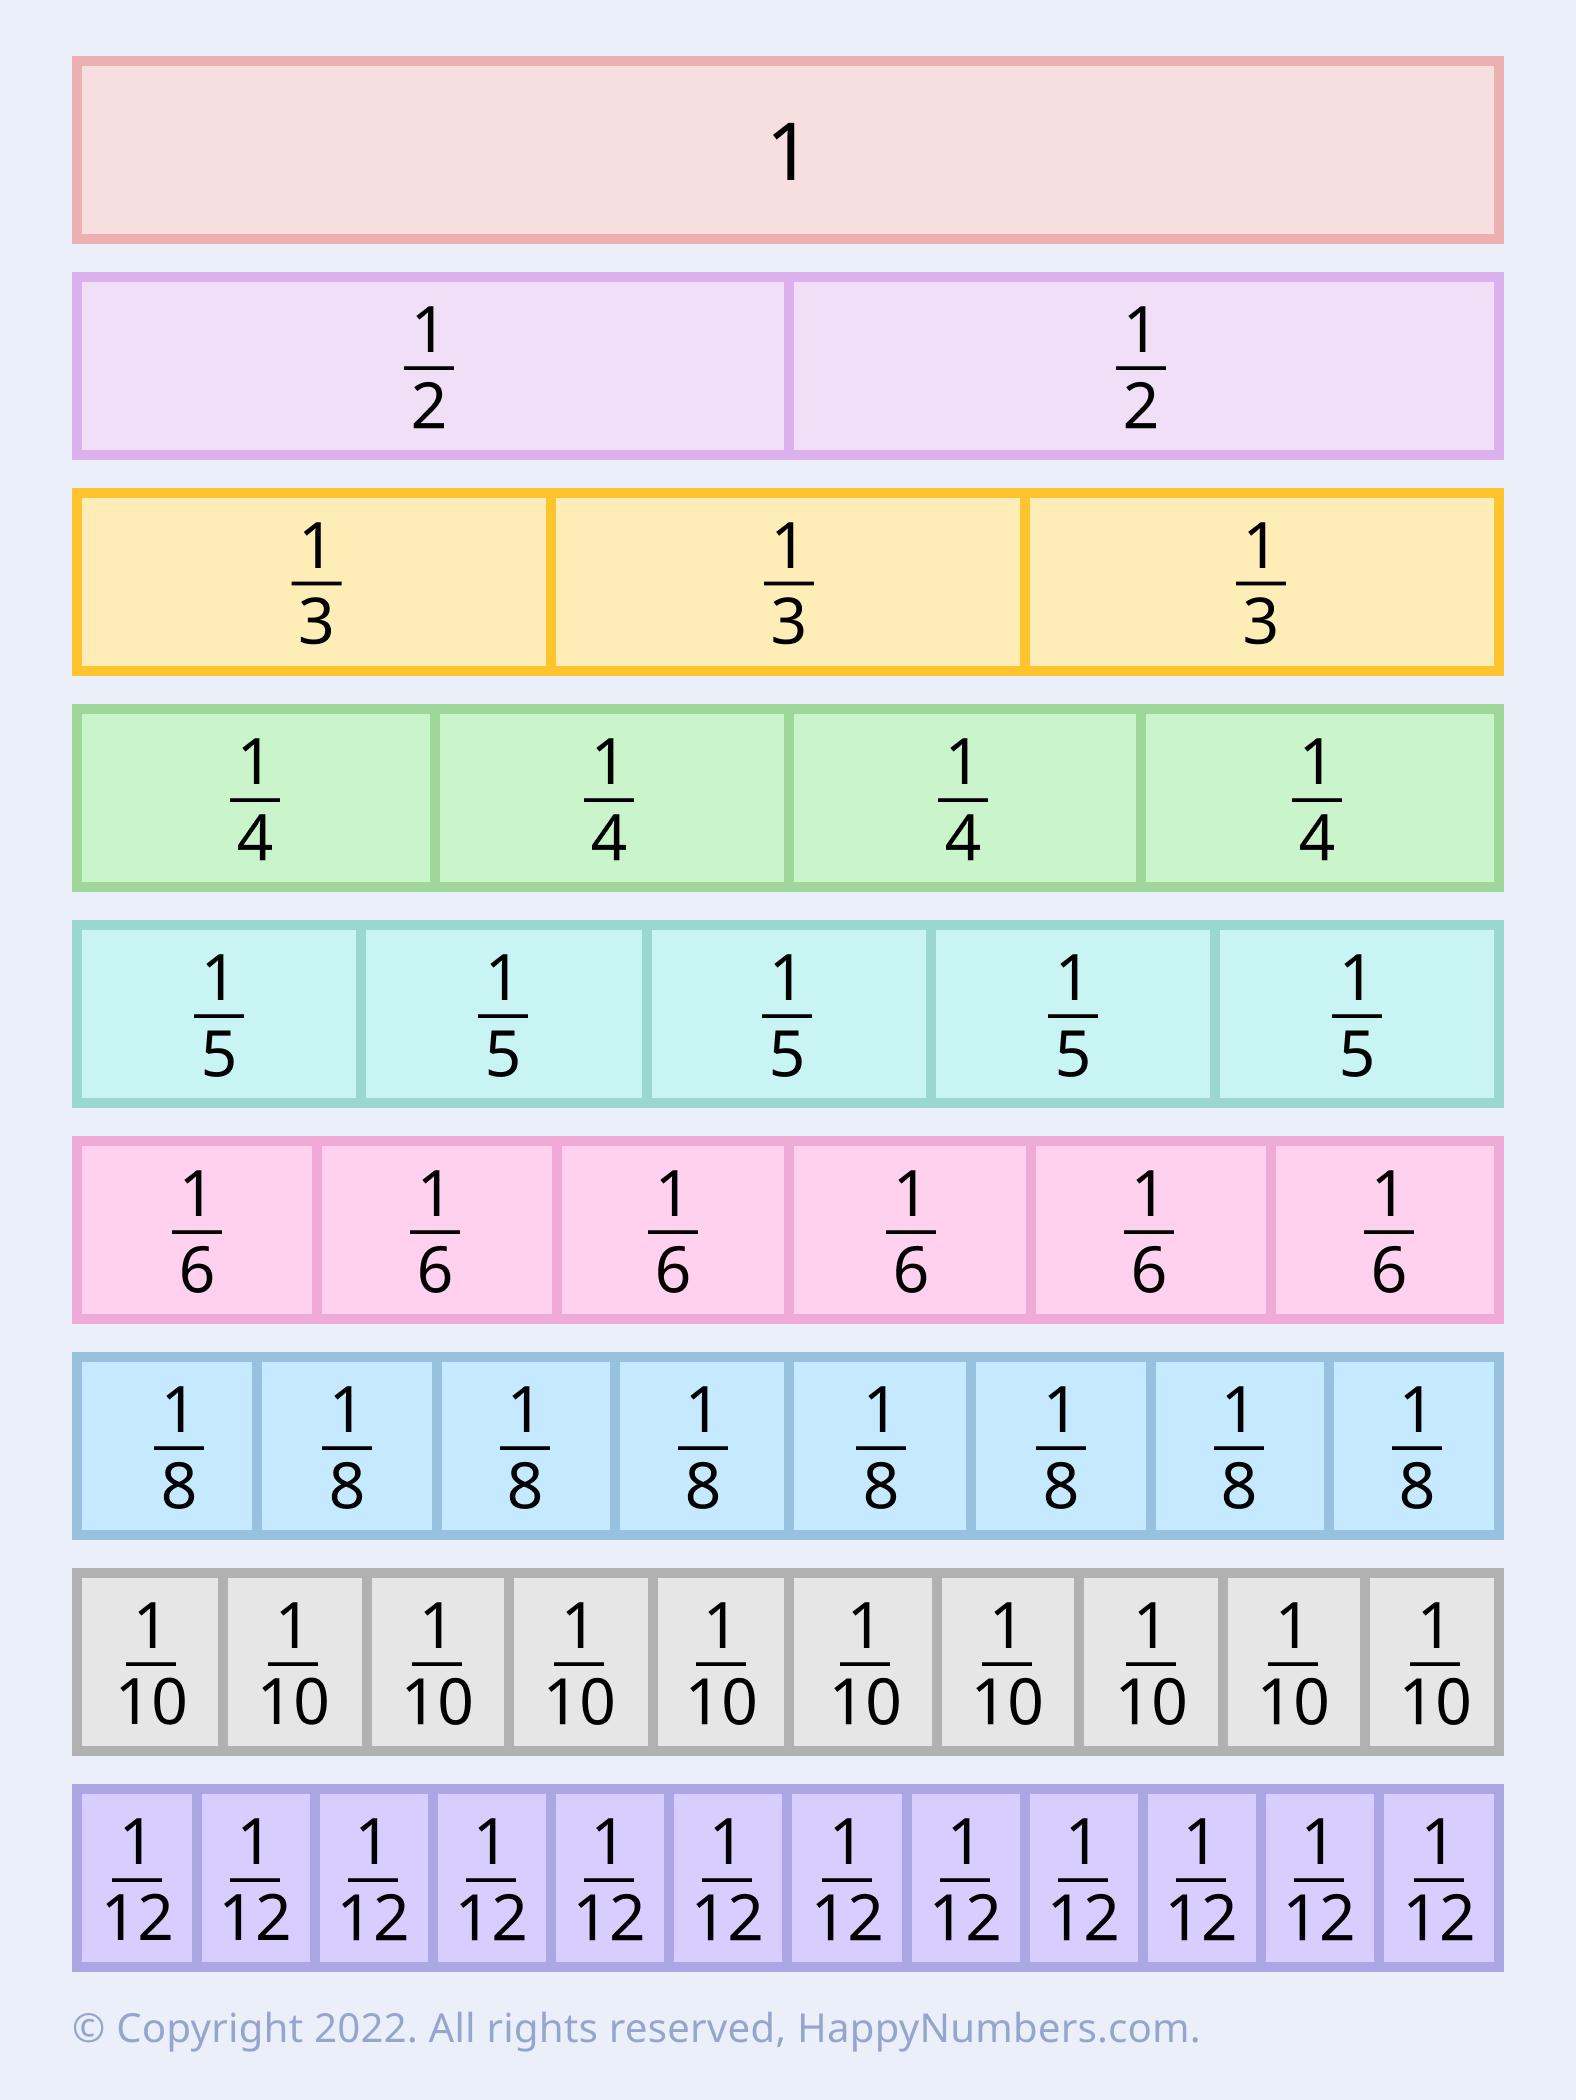
Try including activities with multiple representations of the same concept so that students can master their fluency: models of shapes and number lines are always a good way to do it.
Finally, when your students know the basics of fraction equivalency, they’re ready to move to the next step: learning how to find common denominators of two fractions. The most effective and visually simple way of explaining what a common denominator is would be area modeling.
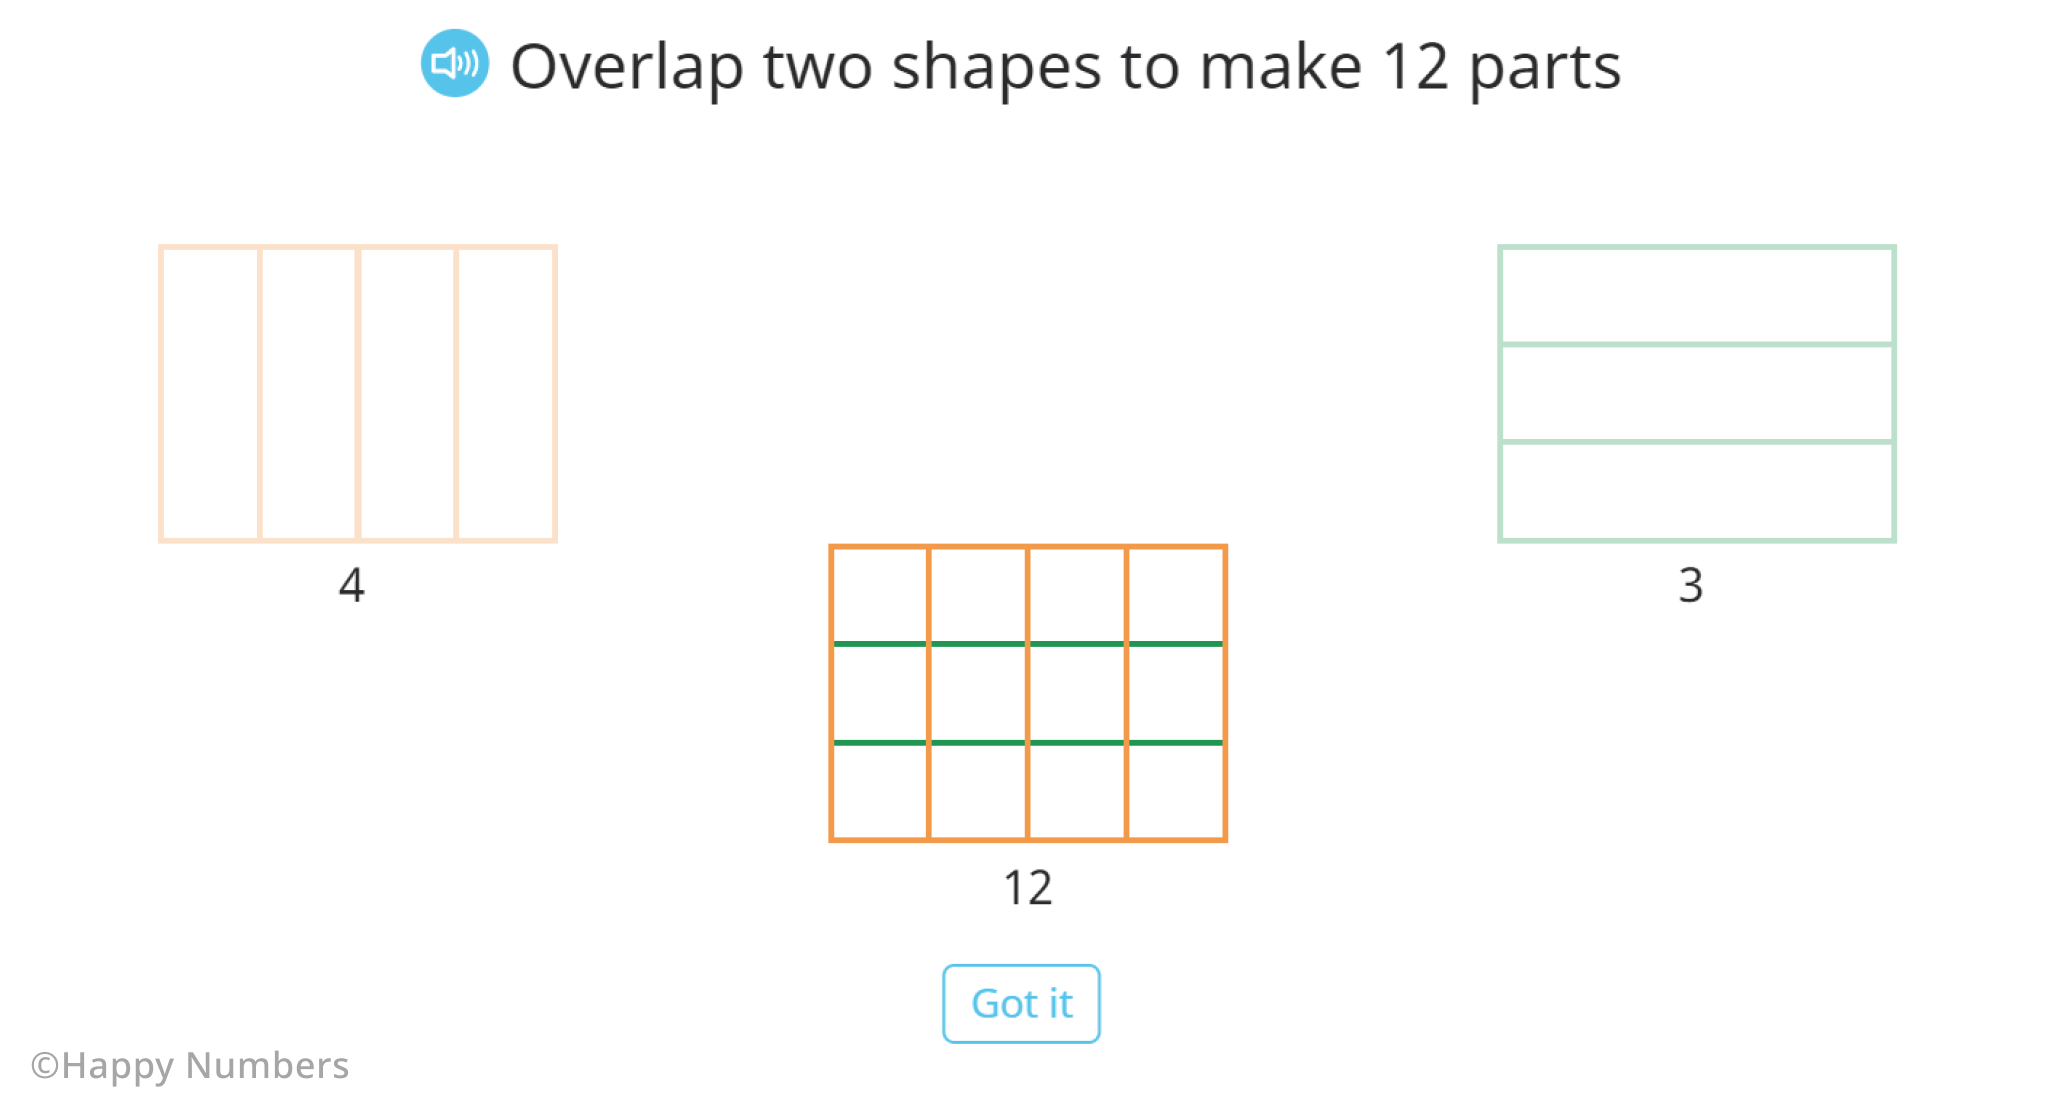
Start by including same-sized shapes divided into different numbers of parts each. To gain more visual exposure, use them as manipulatives – two pieces of paper or transparent sheets with thick horizontal and vertical lines. Ask students to overlap two shapes, divided into different numbers of parts each, to find the total number of pieces. Basically, students need to combine two shapes. By dragging two figures together here, for example, they count the total number of parts, which is 12. By overlapping two pieces of paper they will see their lines crossing each other and creating more pieces in total.
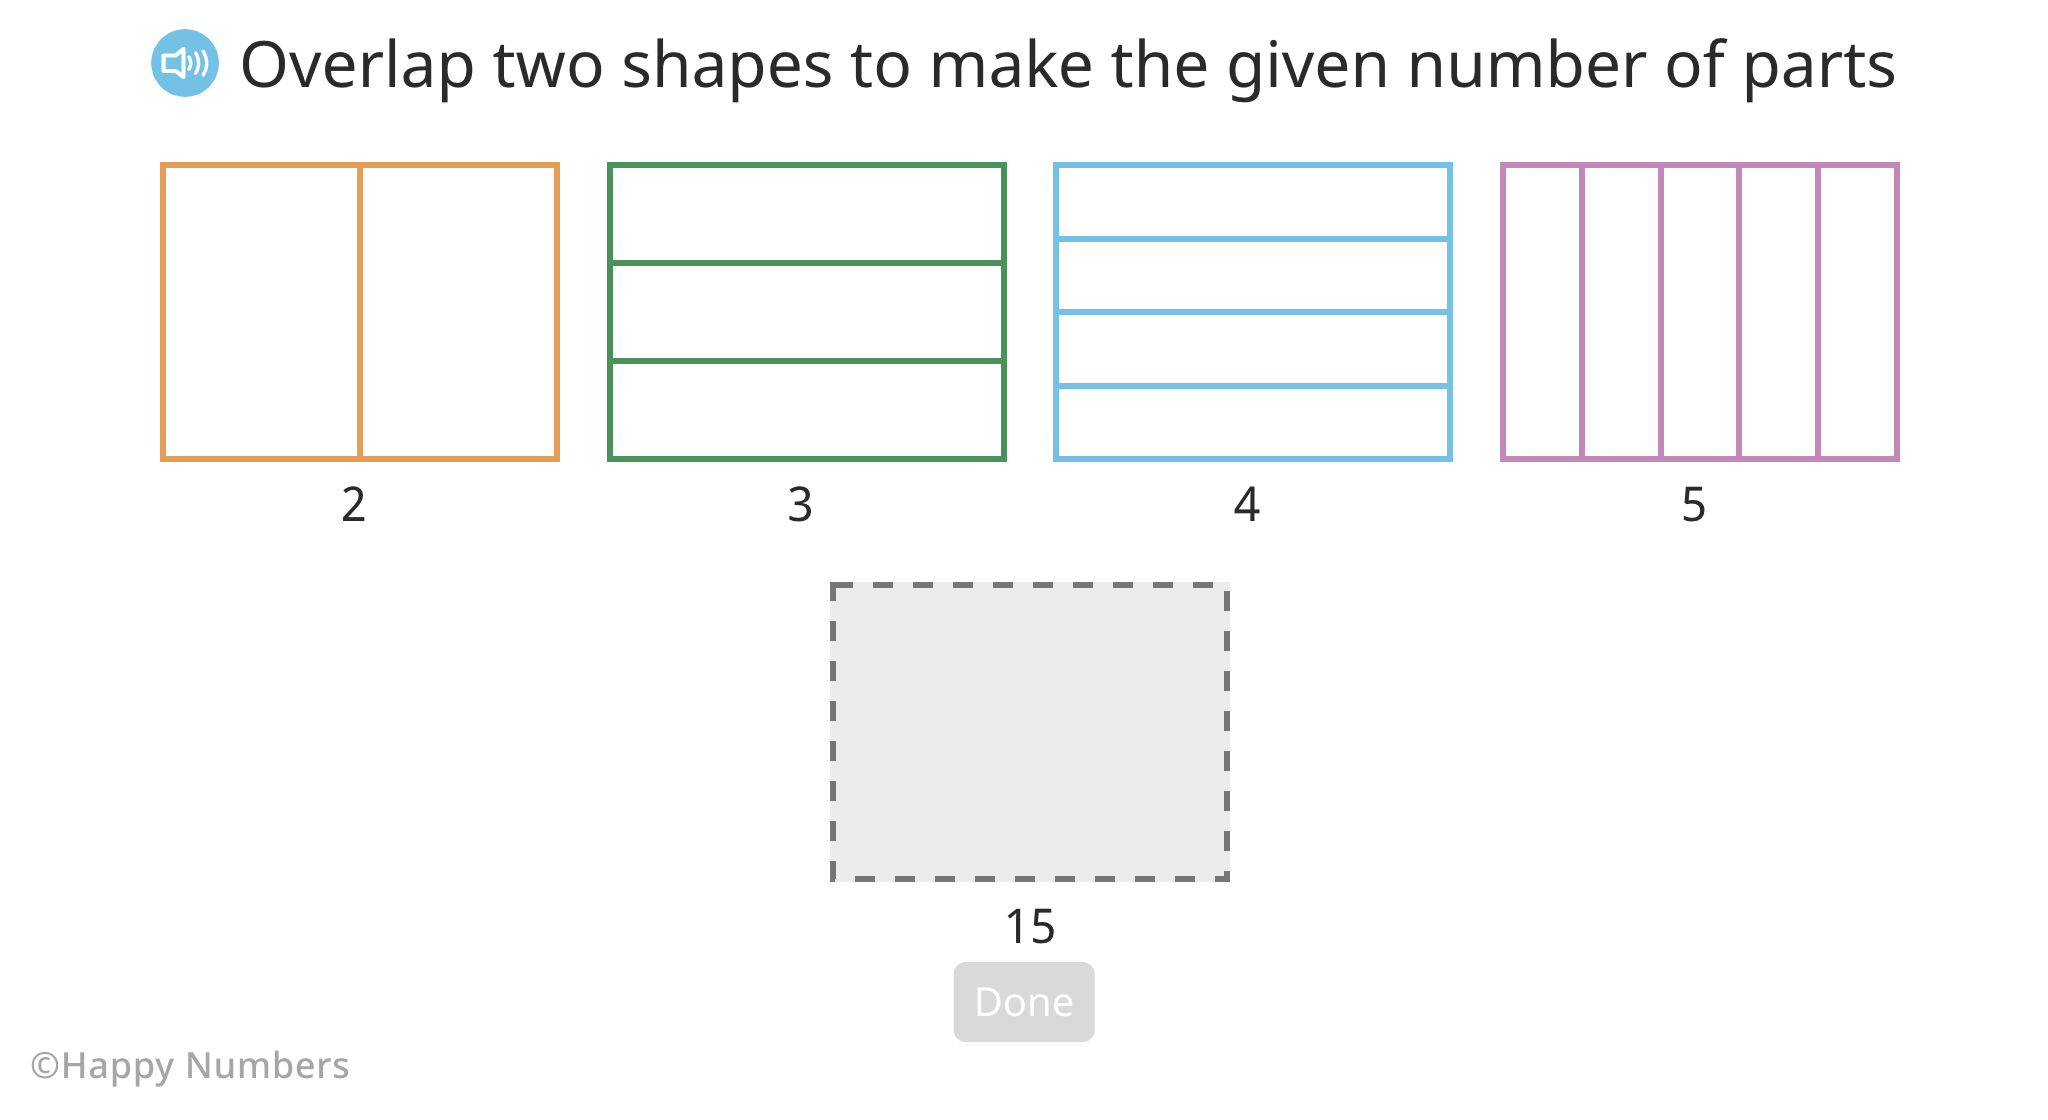
It’s always a good idea to let students practice a bit before moving further. Give them as much similar exercise as you can: for example, ask them to choose among a few presented shapes, two of which will give the required number of parts in total.
Fluency practice is as important as always at this step because students are getting closer to revealing the concept of a common denominator.
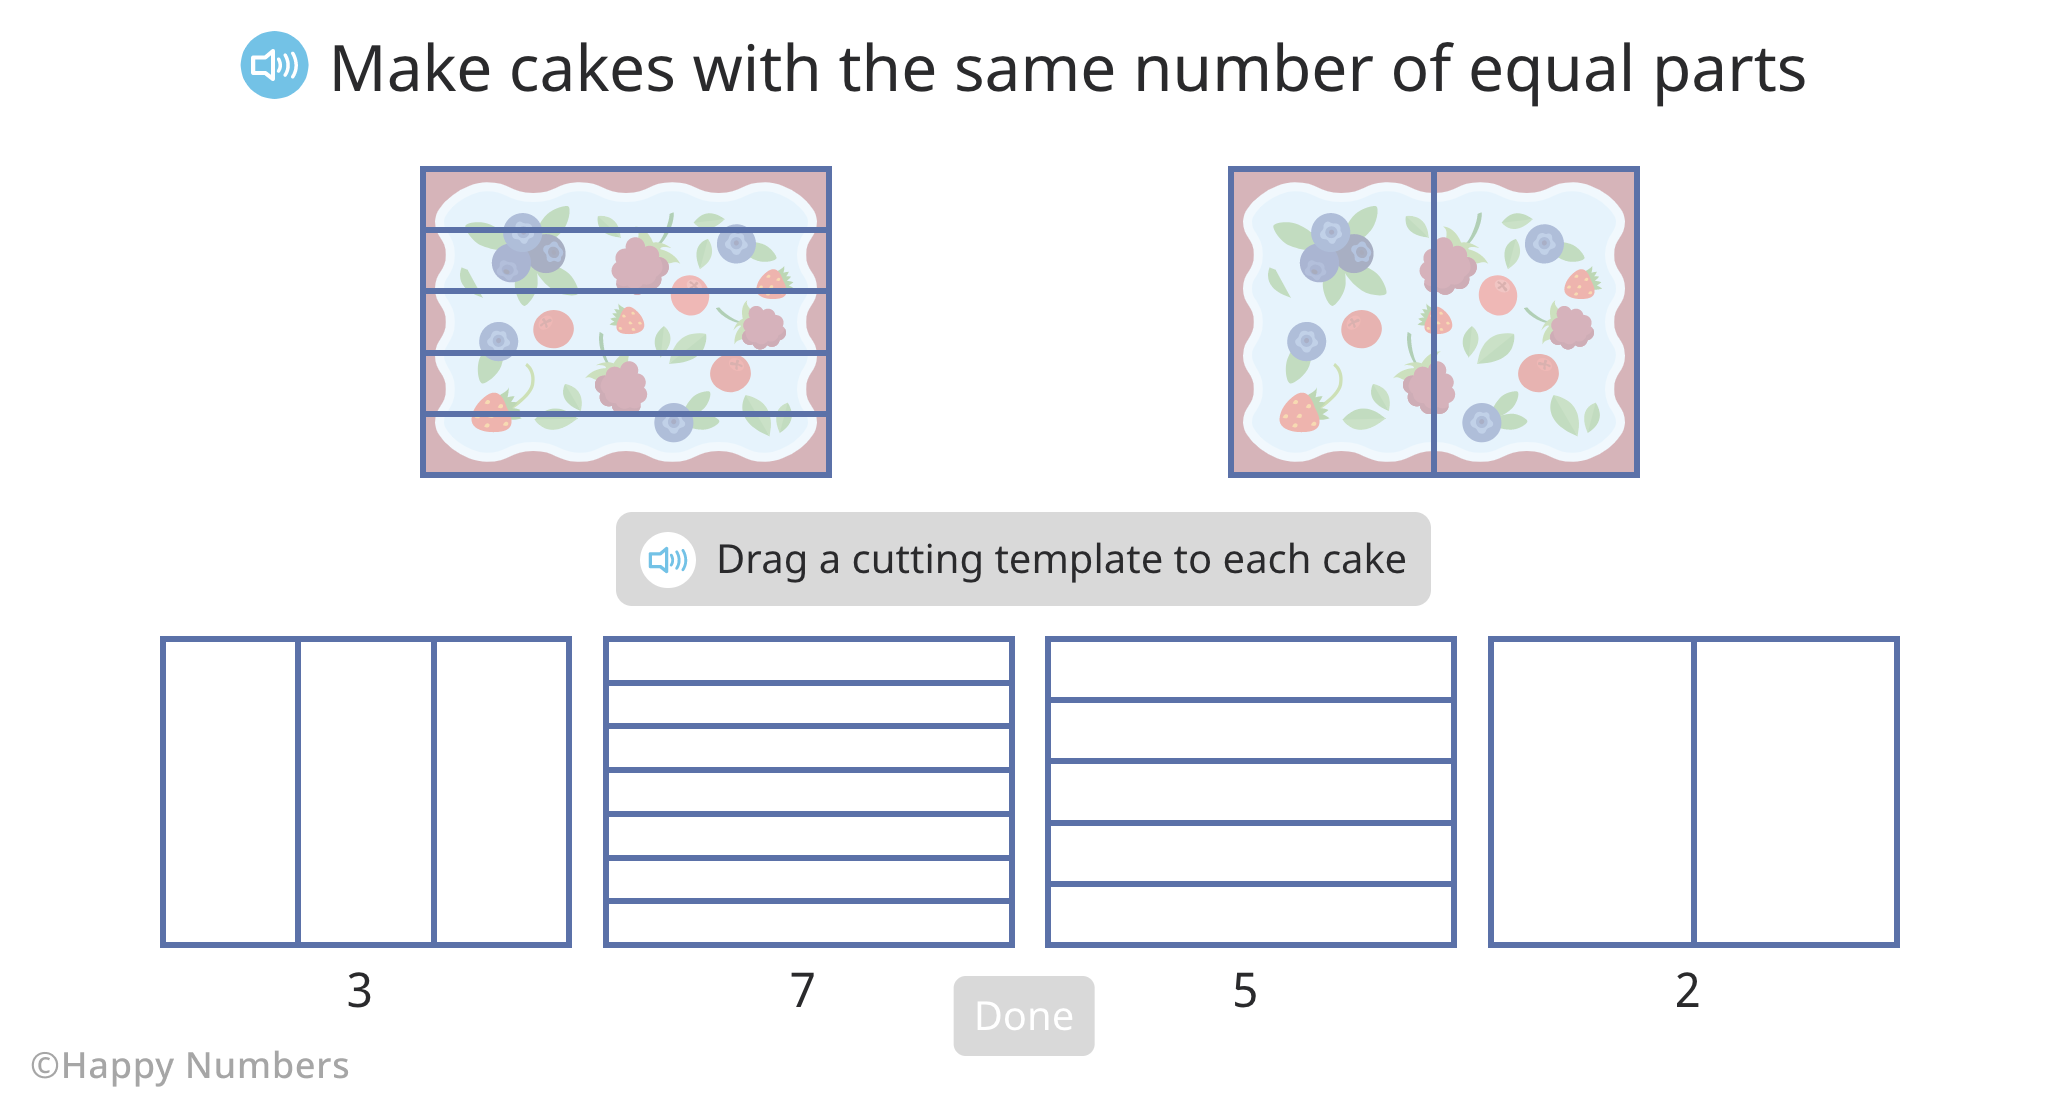
Don’t let your model activities get too boring, and add some familiar references. For example, on Happy Numbers, in the same way they worked with shapes, students should use the correct cutting template to get a common number of pieces for both cakes.
Students see now that in order to equate the number of pieces in both cakes, they need to cut each one into more pieces! This is a perfect way to lay the groundwork for understanding the concept of common denominators.
Add fractions with unlike denominators using area modeling
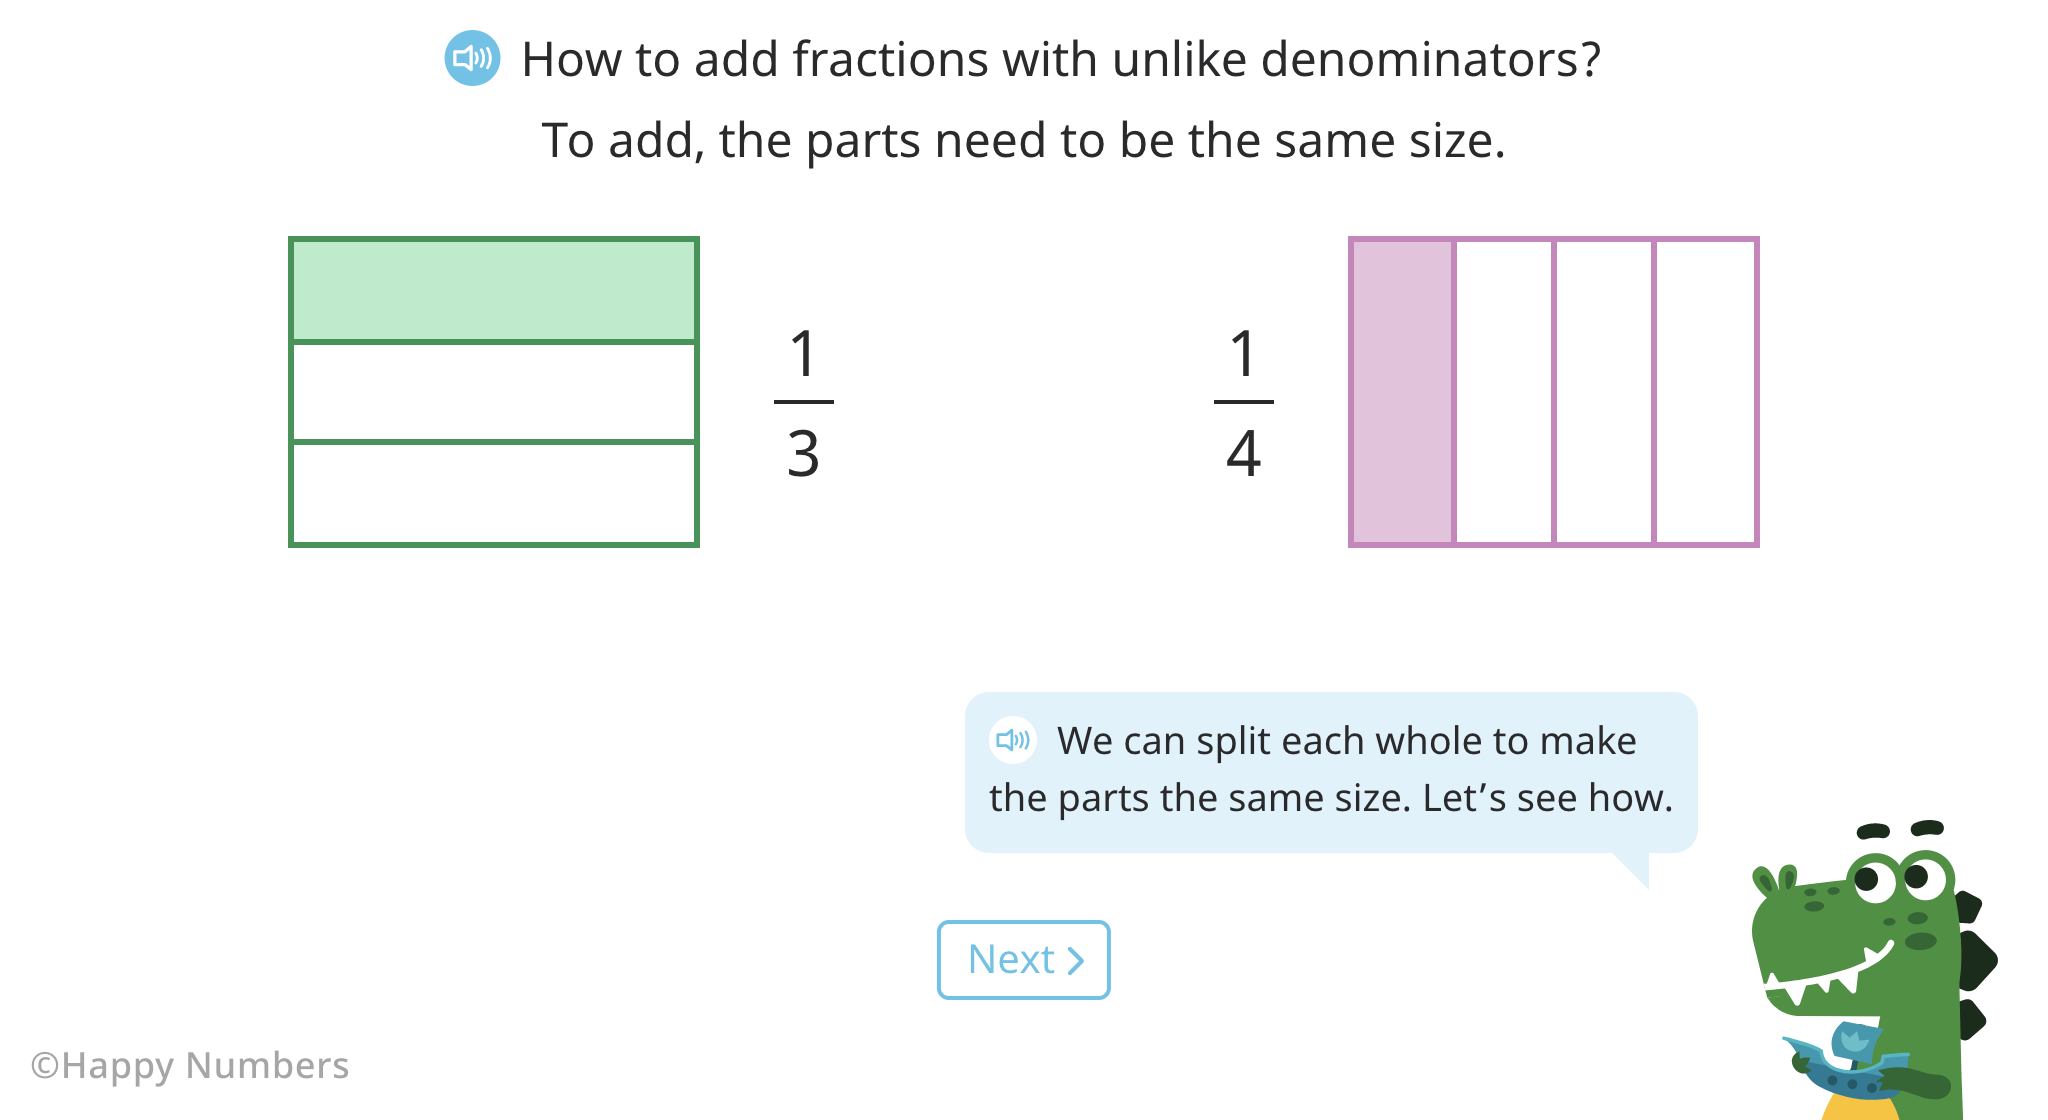
At this point, students are ready to start adding fractions with different denominators. The best way to begin with is by creating references between fractions and models that students previously worked with. Give some examples, from which students can see that two differently sized units, like a unit of thirds and a unit of fourths, for example, simply cannot be added together.
However, students know how to add units that have the same number of parts (or fractions that have the same denominators), and this knowledge will help them out.
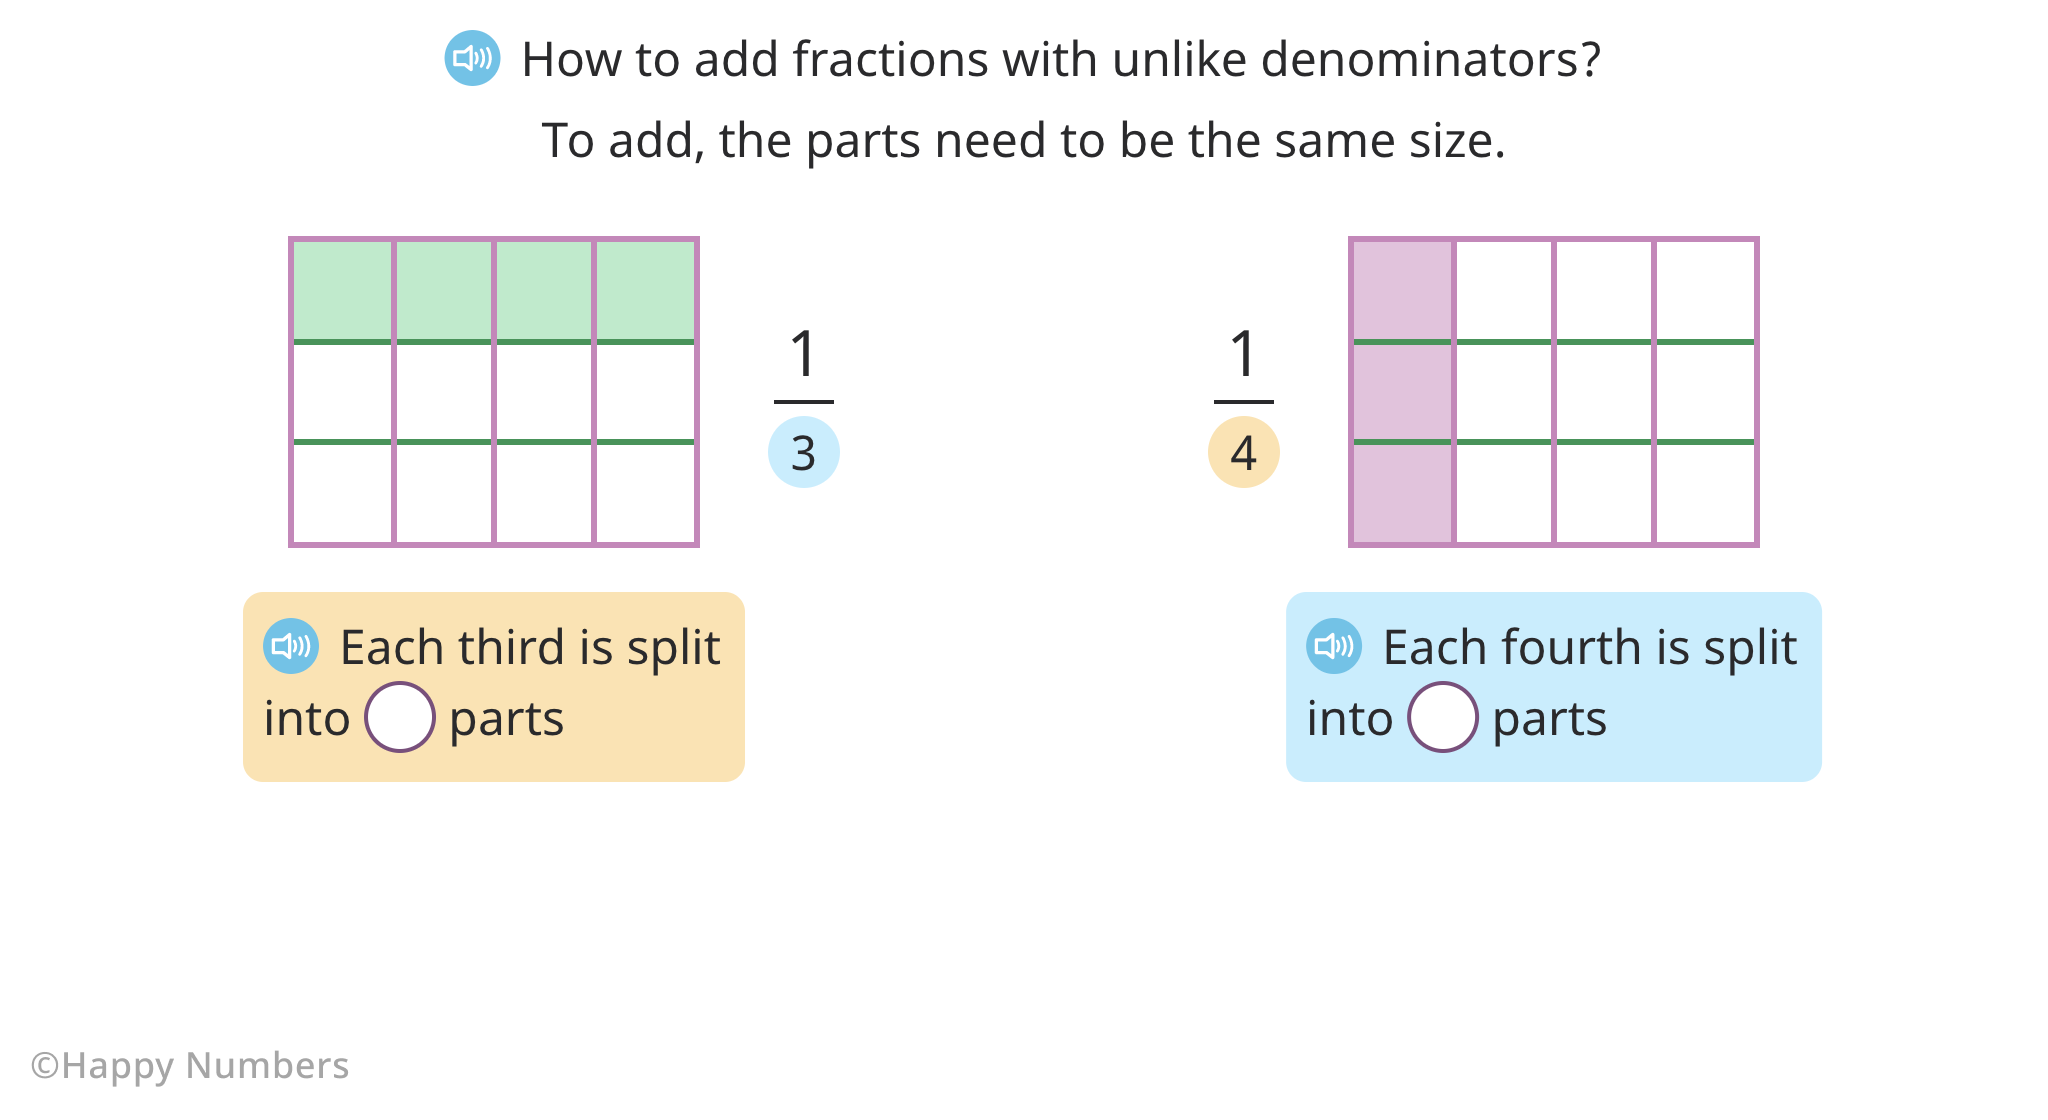
This means that before adding two fractions with different denominators, students have to make sure that they have the same denominator or, if referring to models, that the shapes have a common number of parts.
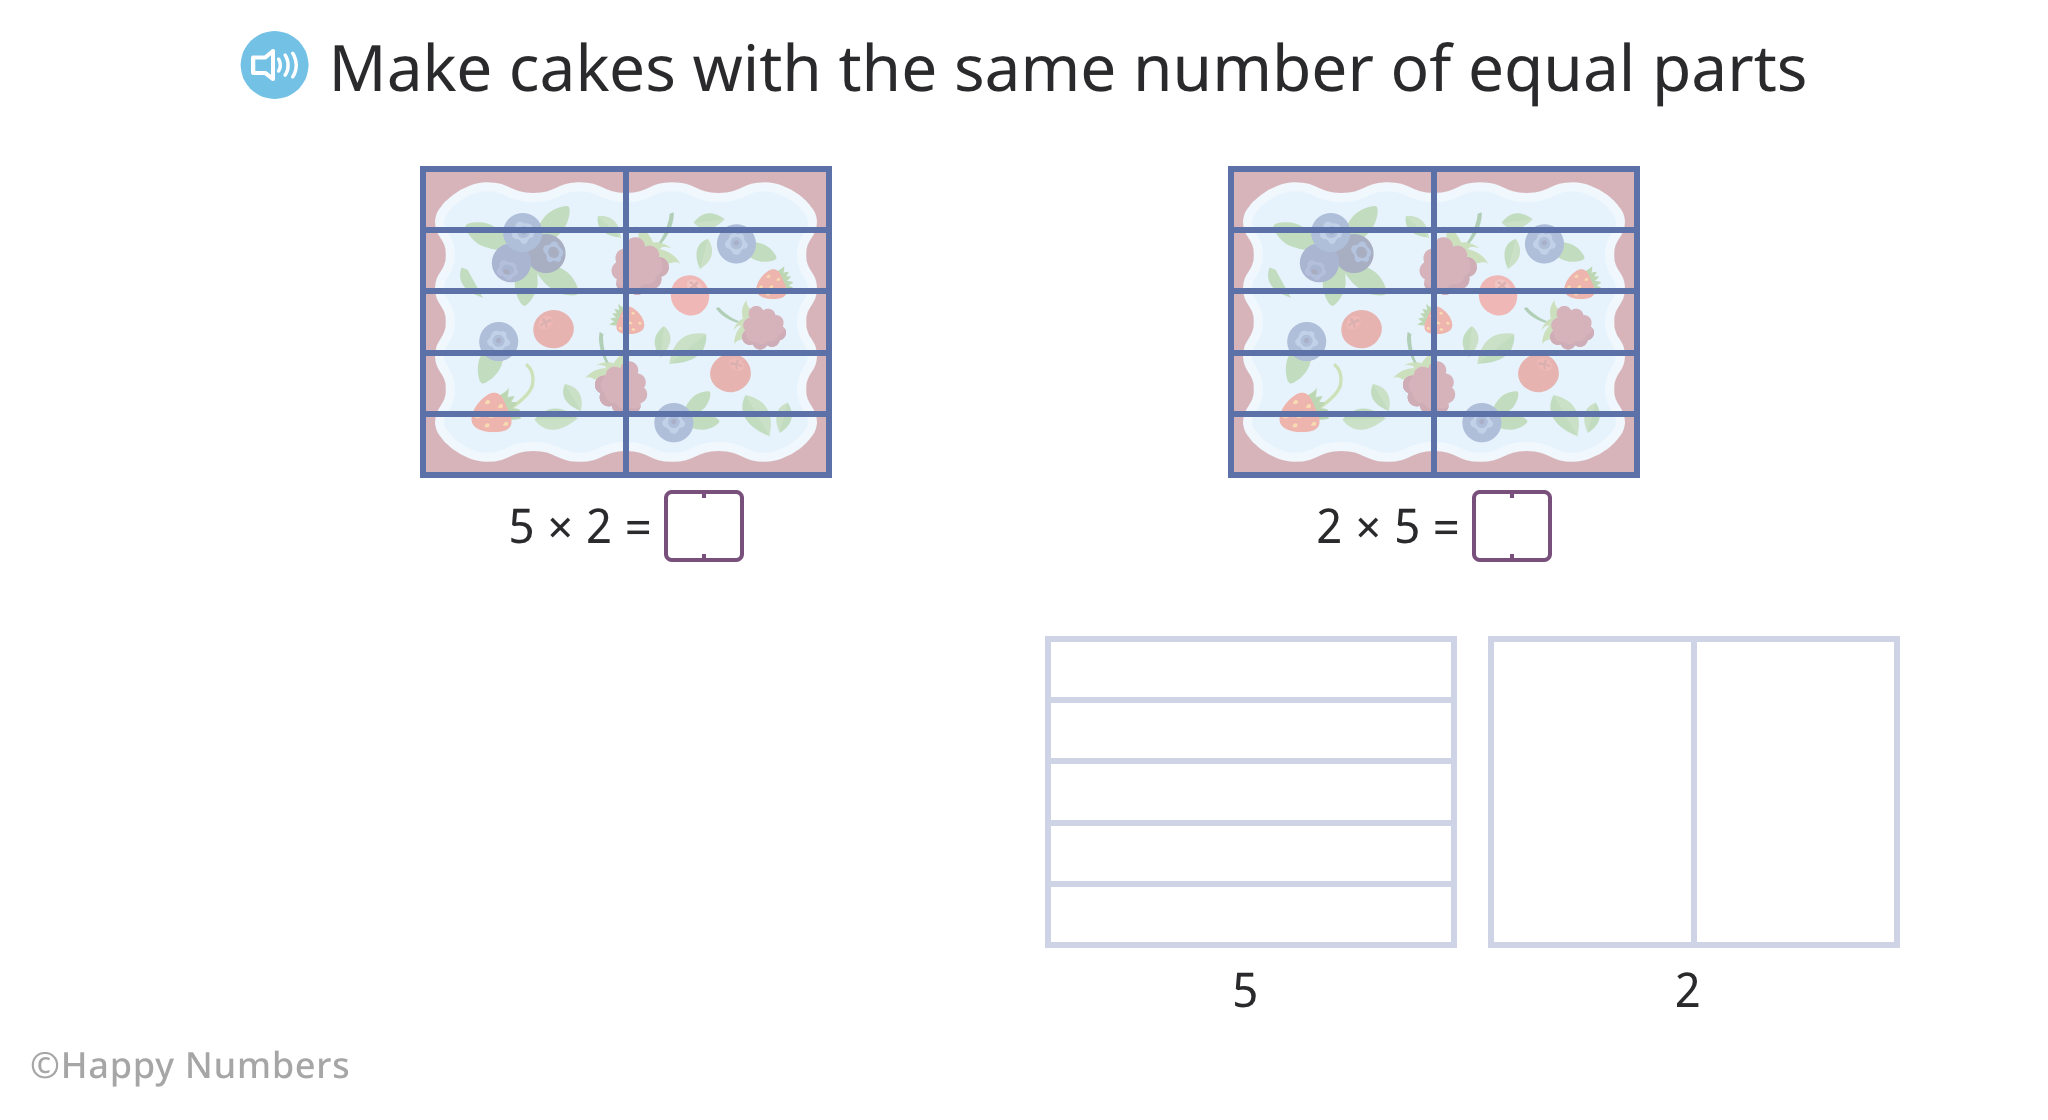
Teachers can remind students that they’ve already gone through this step earlier, while they were cutting cakes to get the same number of parts. Only this time, they’ll have to work the same way with fractions, while relating them to models.
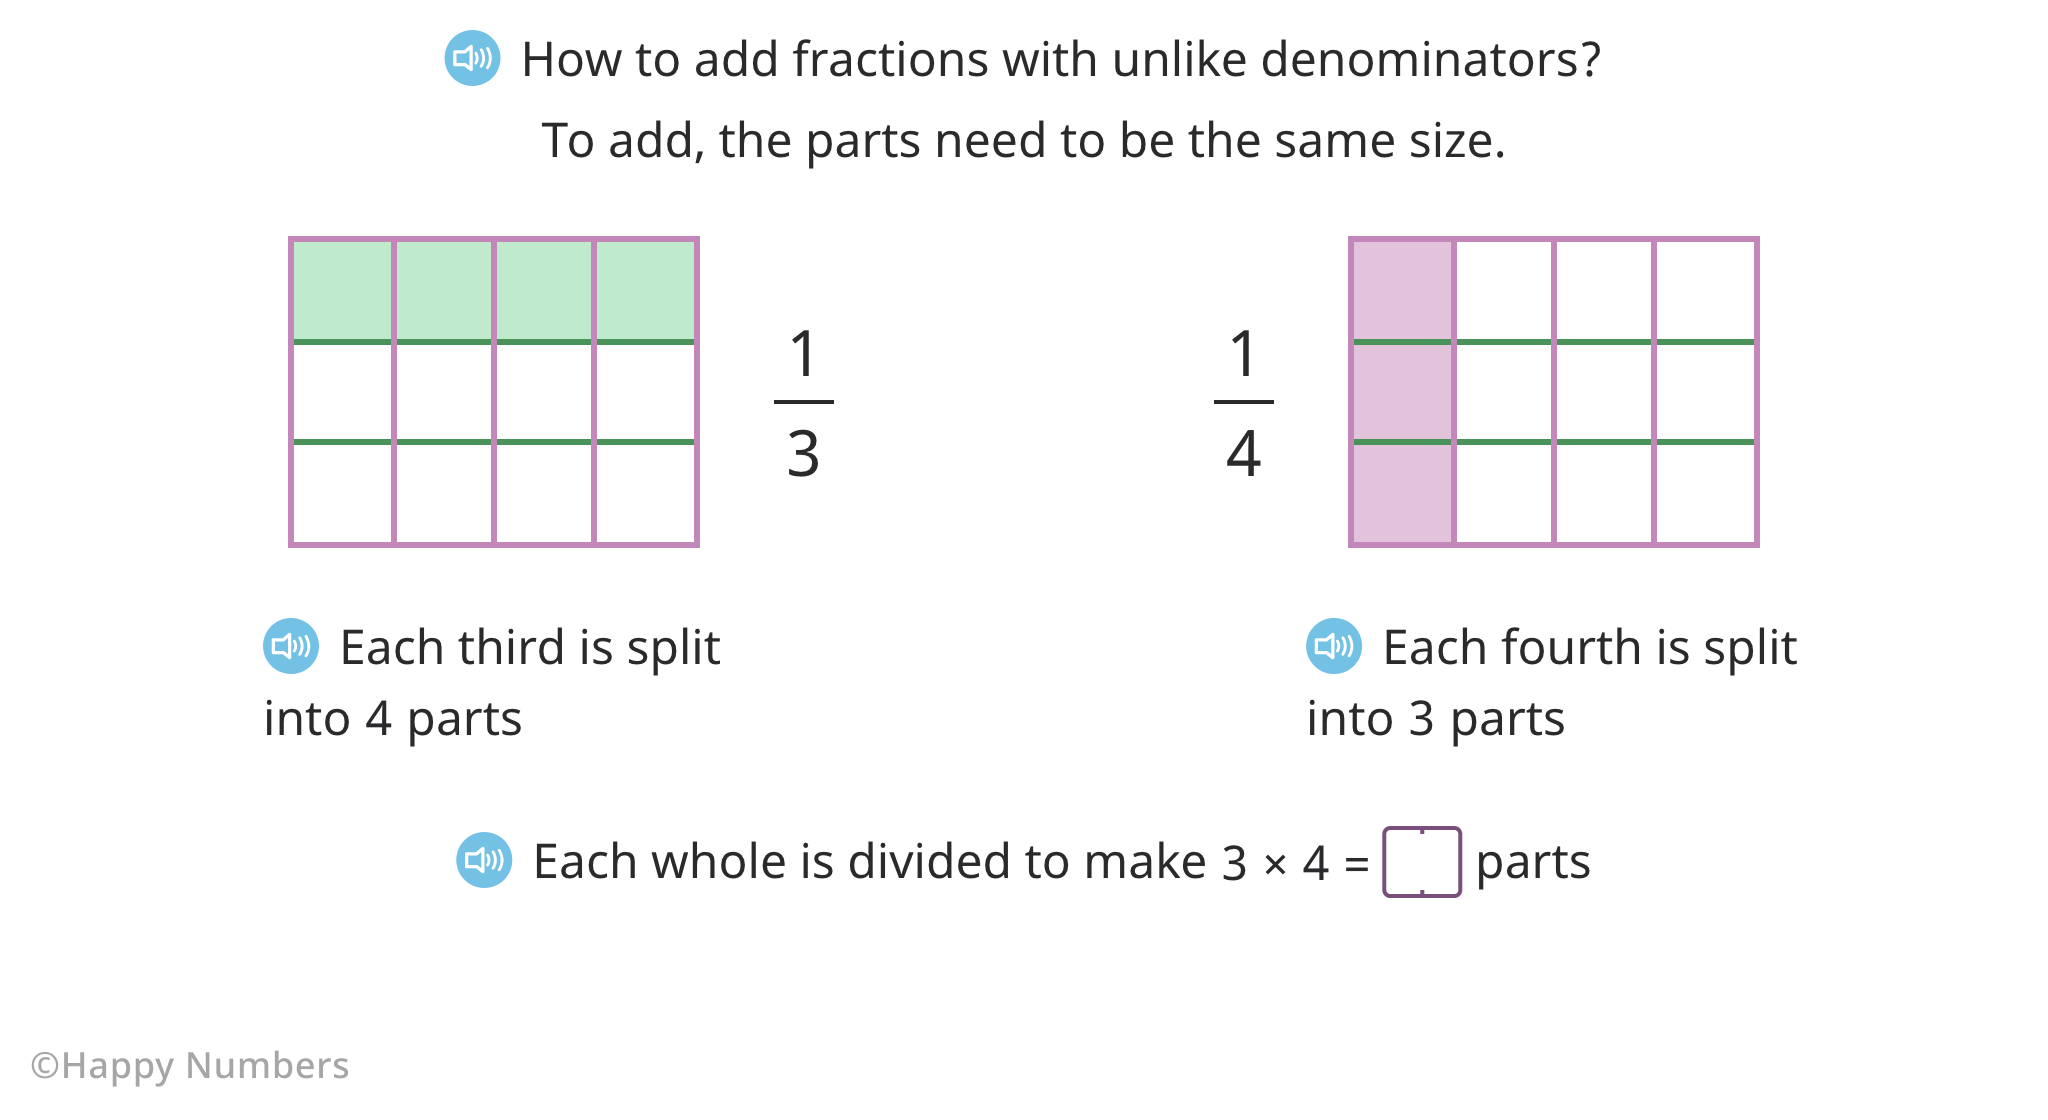
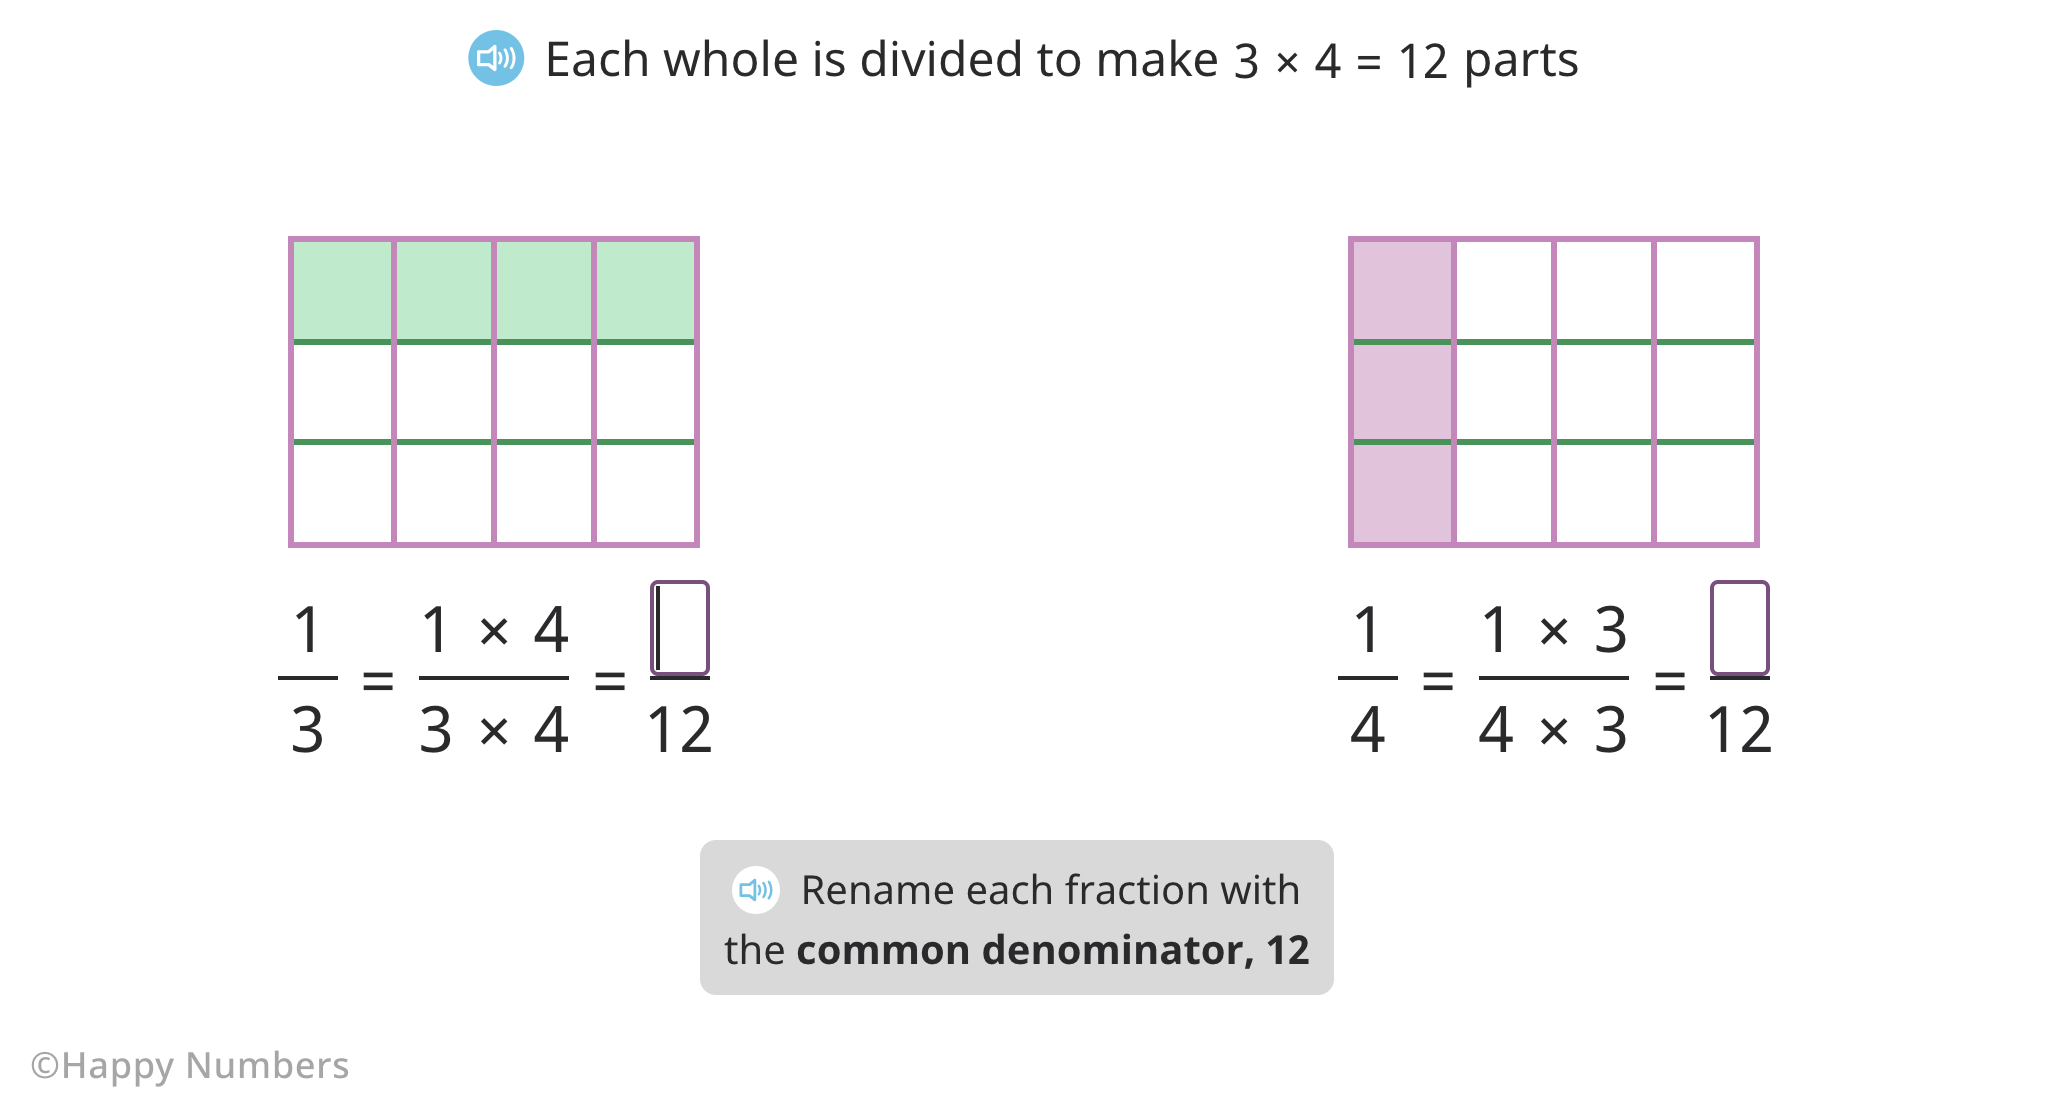
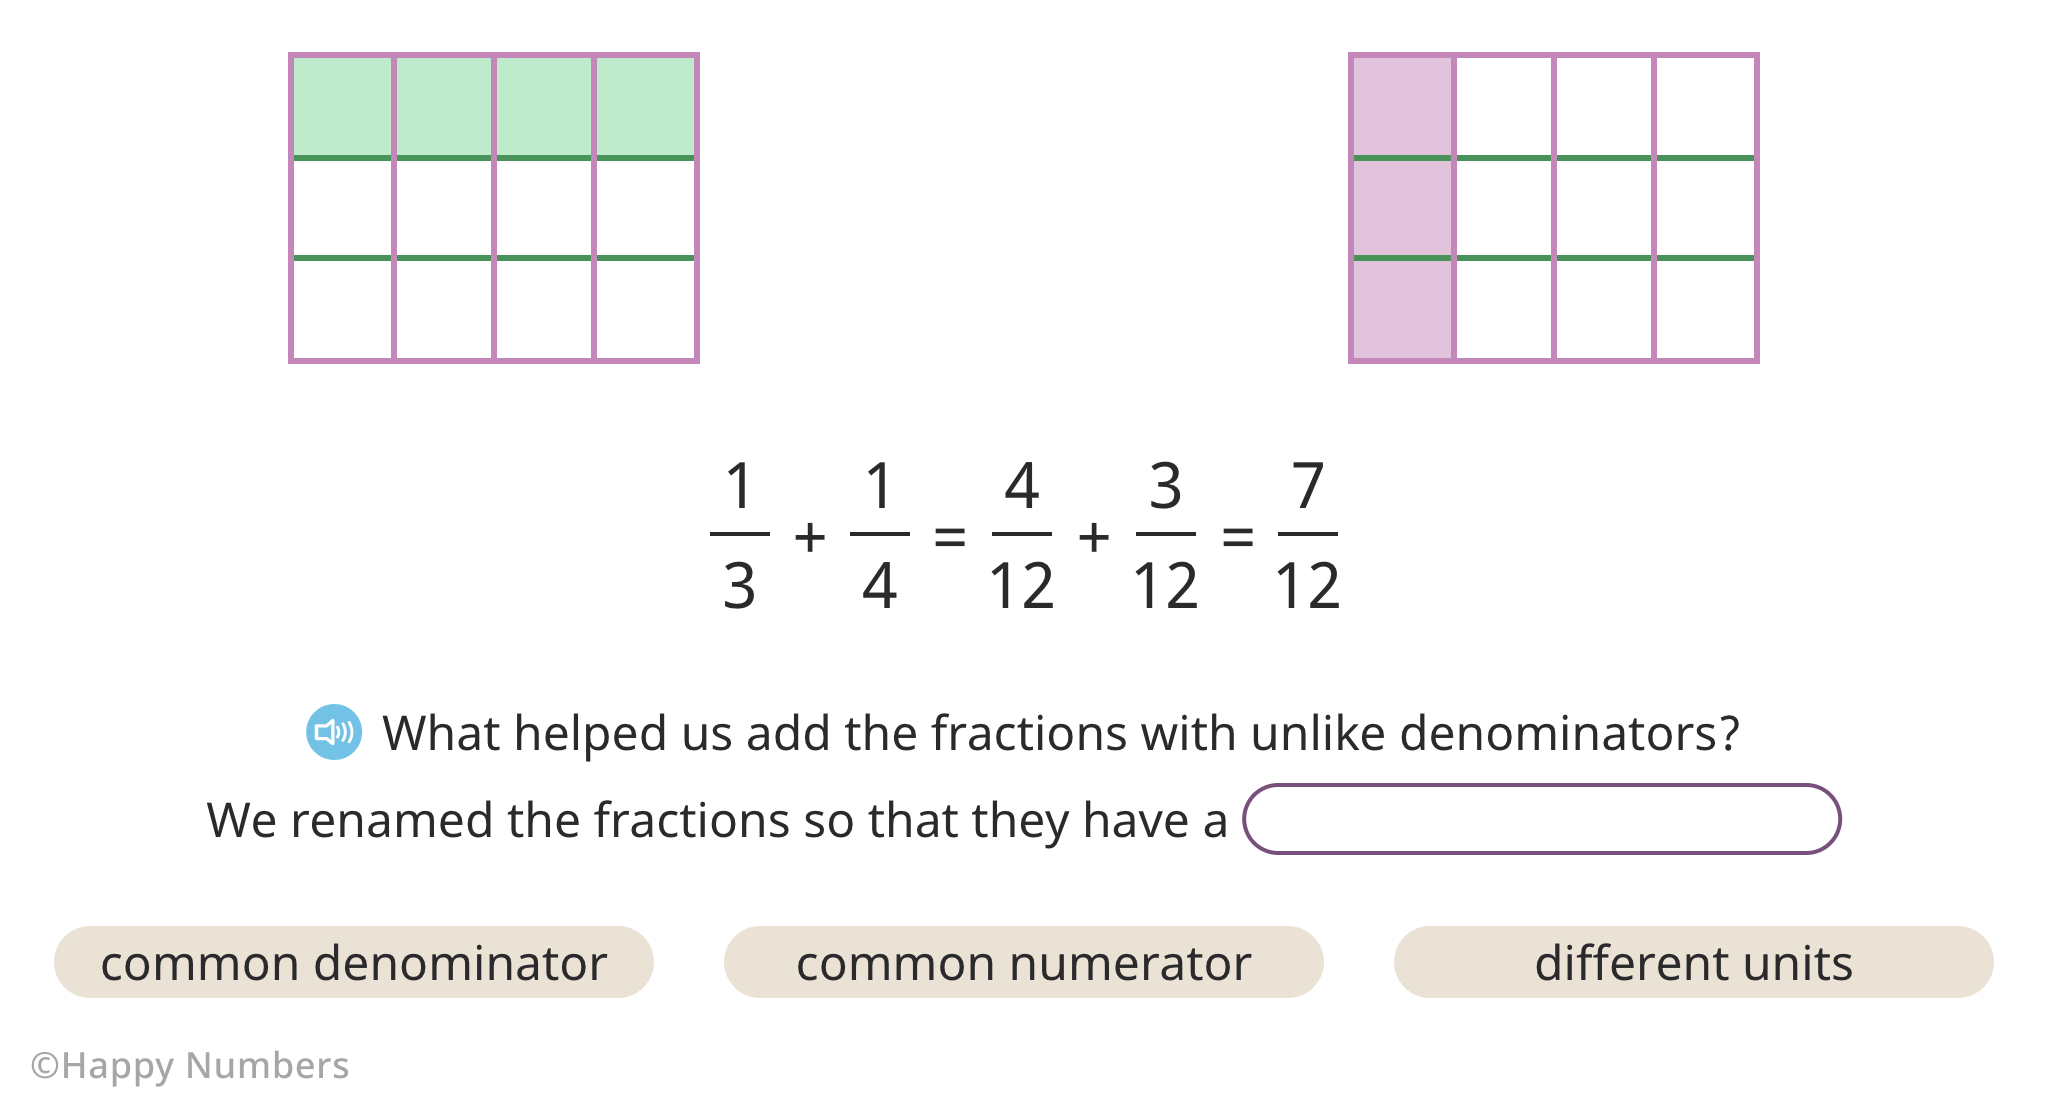
Eventually, teachers get to the point where they can introduce the concept of the common denominator - a common multiple of two different denominators.
Show students that finding a common multiple of two different denominators is actually what finding a common denominator is.
Now, using this knowledge, students can rename each fraction first, turning it into its equivalent with the denominator 12. This way 1/3 becomes 4/12 and 1/4 becomes 3/12.
Then, teachers can remind students that 4/12 and 3/12 can be easily added by relying on the skill that they’ve already mastered - adding fractions with common denominators. As simple as that!
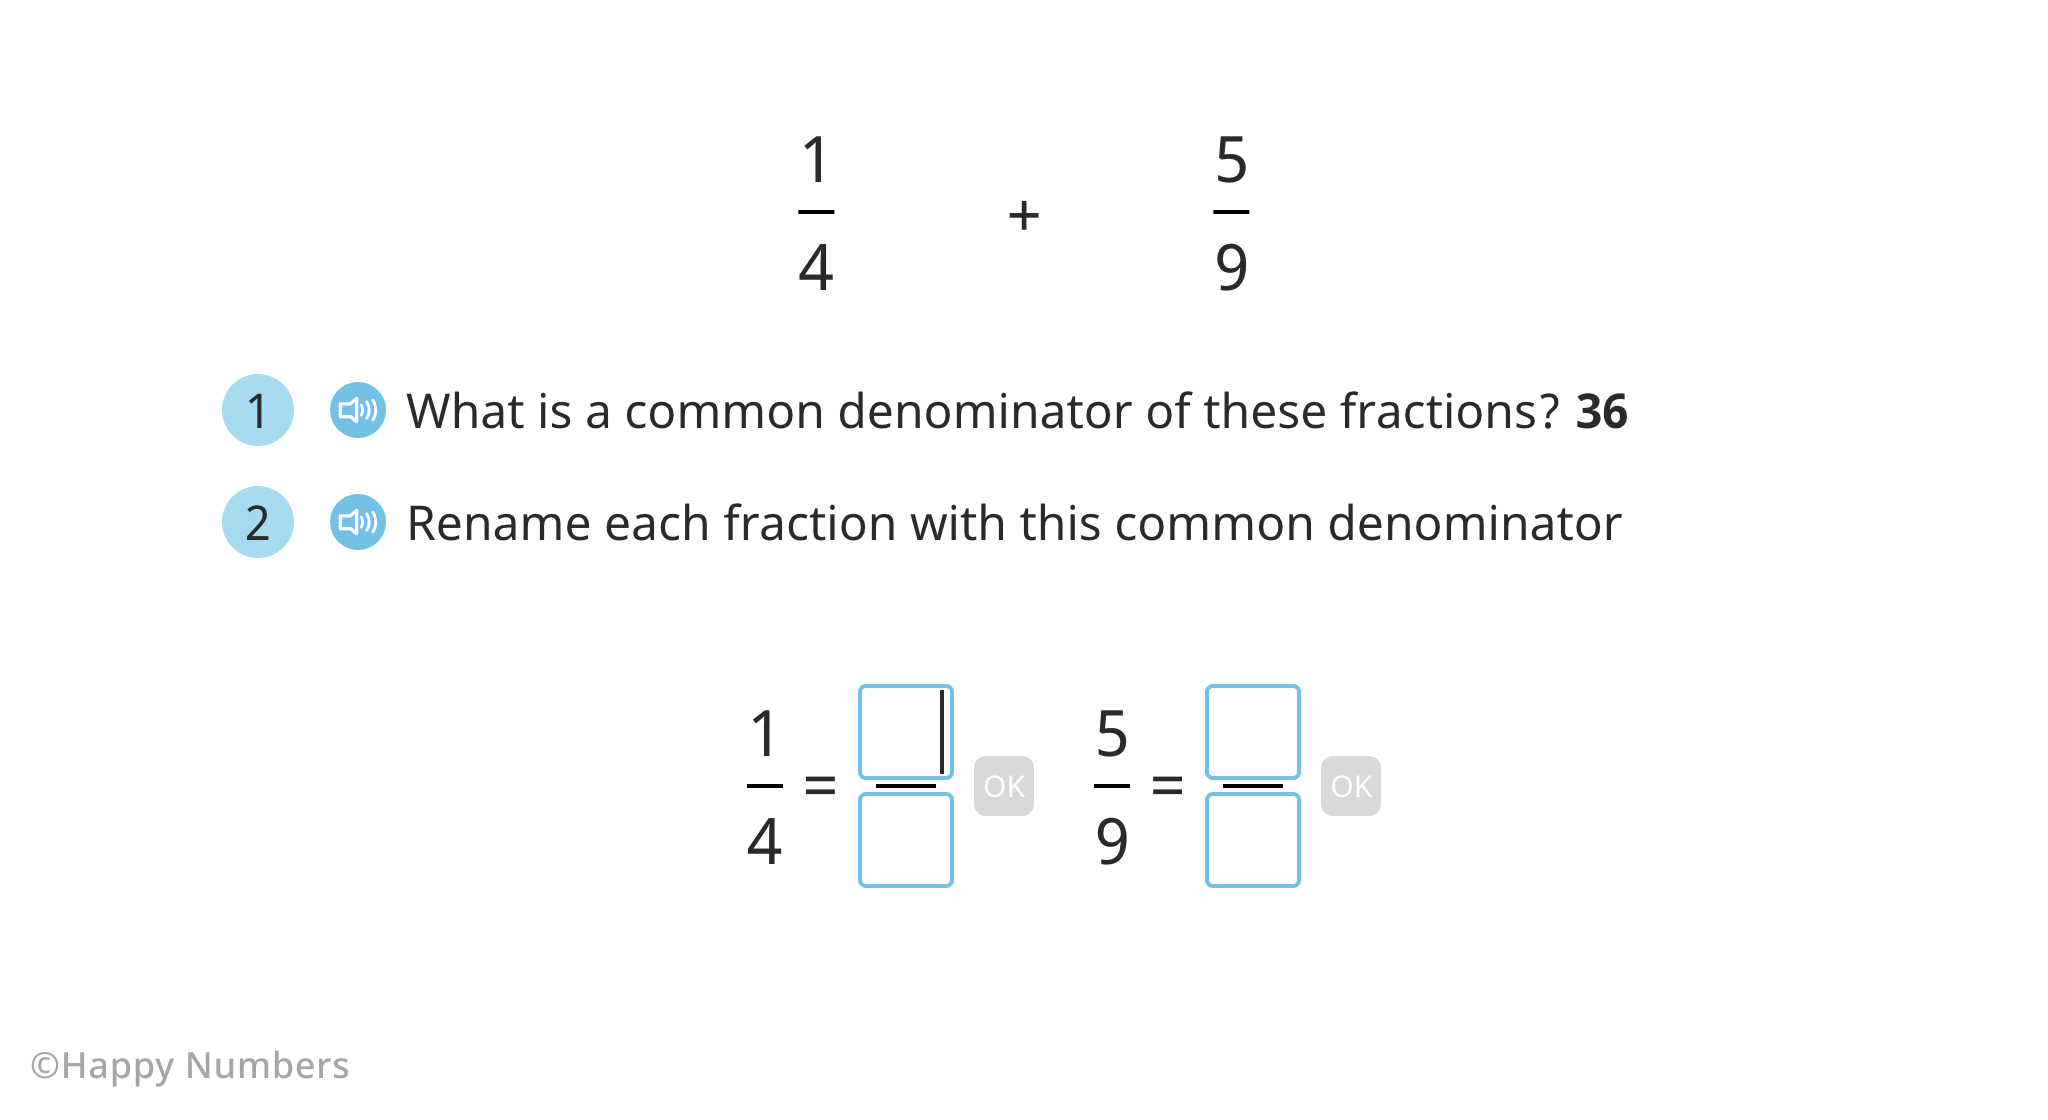
Moving on to the next step, students will need plenty of fluency practice. To come up with the best ways to do it, check out the example below and in the the rest of the activity ideas that HappyNumbers uses in its own lessons to help students master the skill on a mental level.
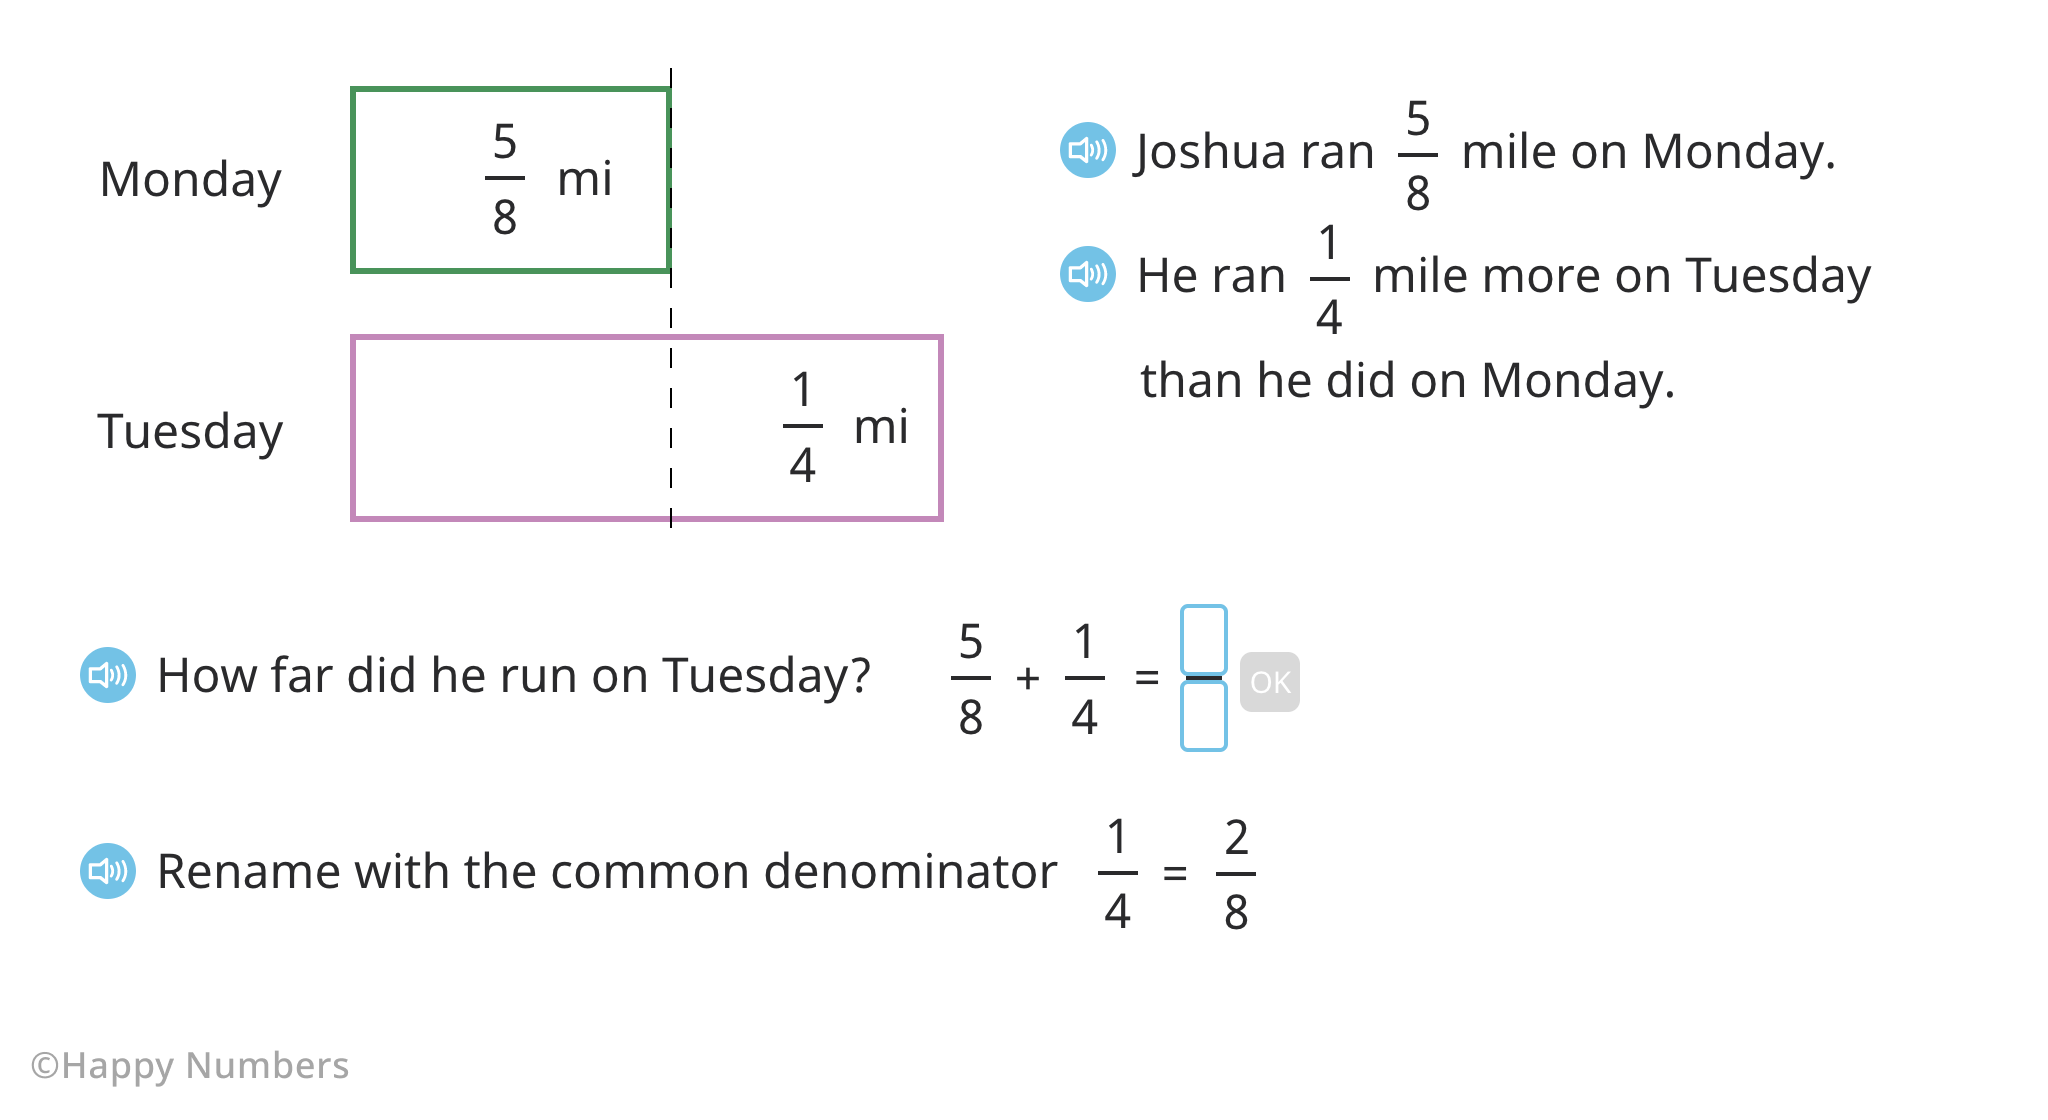
The final step is to lead students to solving word problems on fraction addition. This is a chance to apply the skills that they’ve mastered so far in real-world scenarios. Teachers can go further and ask students to create their own problems, based on models first, just like Happy Numbers does. Finally, students move to word problems that require solely mental calculations.
Adding fractions with unlike denominators can be a daunting topic, including multiple steps to perform and various concepts to master. From the basics of fraction equivalency to the concepts of common factors and greatest common factors - each step should be executed carefully to improve students’ comprehension and ability to apply the skill to real-world situations.